
An introduction to this series:
I previously was watching this Netflix show, Blank Menu for You, where an introverted chef receives anonymous and story-form meal orders from celebrity guests, and cooks for them to his interpretation of their order. A key tenet of the show is that the guest gives the meal a name once they have eaten it to capture their feelings on their meal experience. What stands out to me about the chef’s cooking is his emphasis on slowness, almost a meditative way of cooking, which is how I feel about baking cakes. Cakes are a time-consuming effort of research and deliberation, flavor-design, architect-ing, and consideration for the meaning of the occasion or the feelings for the person which the cake is baked for. I guess that is why, like Chef Kang-rok, I believe that something so filled with meaning should be named aptly.
The backstory:
Today’s cake is inspired by my dad’s upcoming July birthday, which happens to be his 60th. A little about my dad: he was born in Nha Trang, a Vietnamese coastal town, known for its white sand beaches. I remember him recalling the out-stretched, narrow strips of beach he saw growing up, and a childhood memory of watching his older brothers free-swimming out to sea from the shore, so far he could barely see them anymore. In his day, the beaches were unclaimed by resorts, and belonged to anyone who needed to breathe the sea.
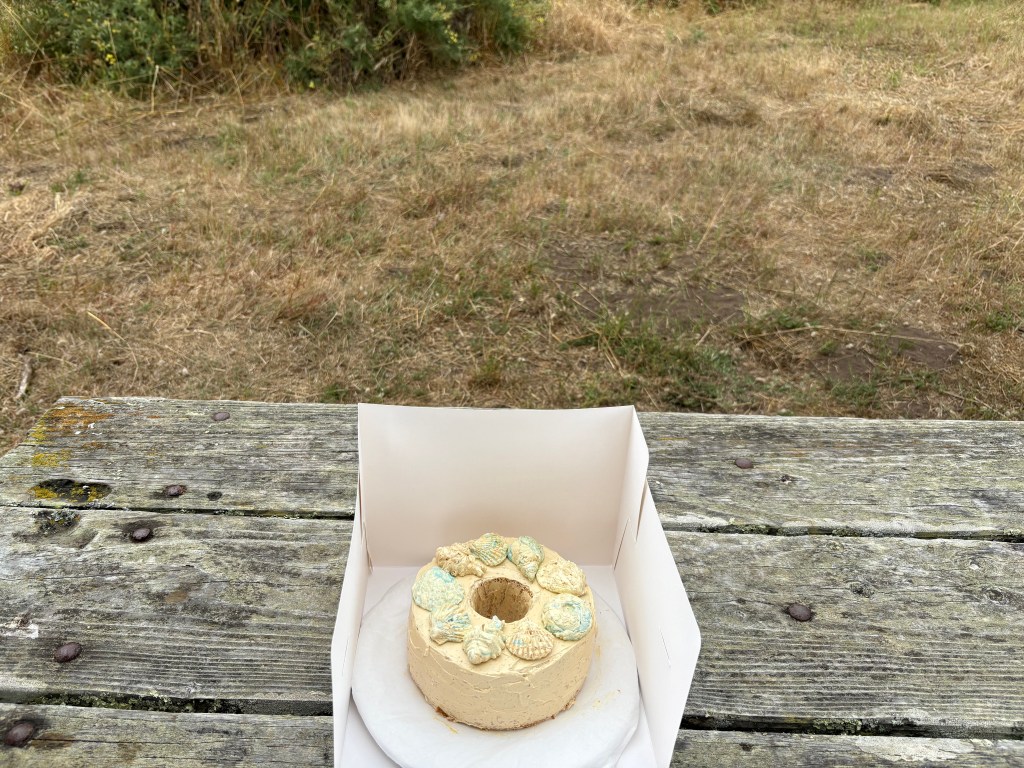
I was reminded of these stories when this year, for his birthday weekend, my dad told us that he wanted to hike at the Point Reyes National Seashore. So, I wanted to bake a cake that I could bring out to seaside picnic for the occasion, and would also evoke childhood nostalgia for my dad.

The cake:
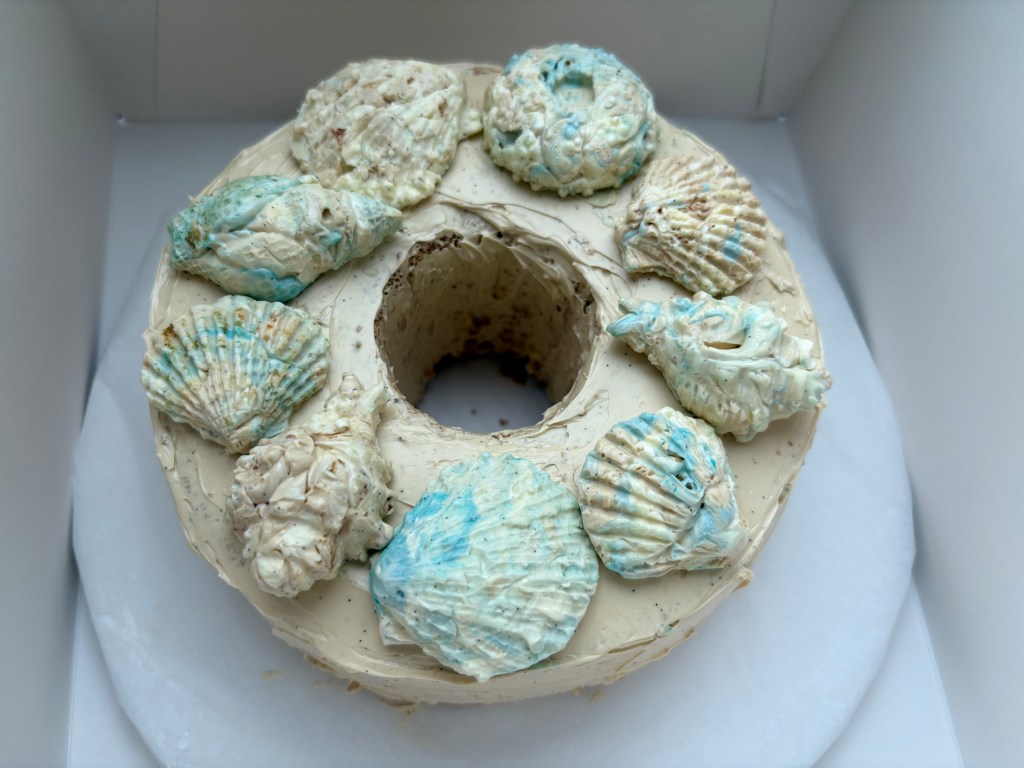
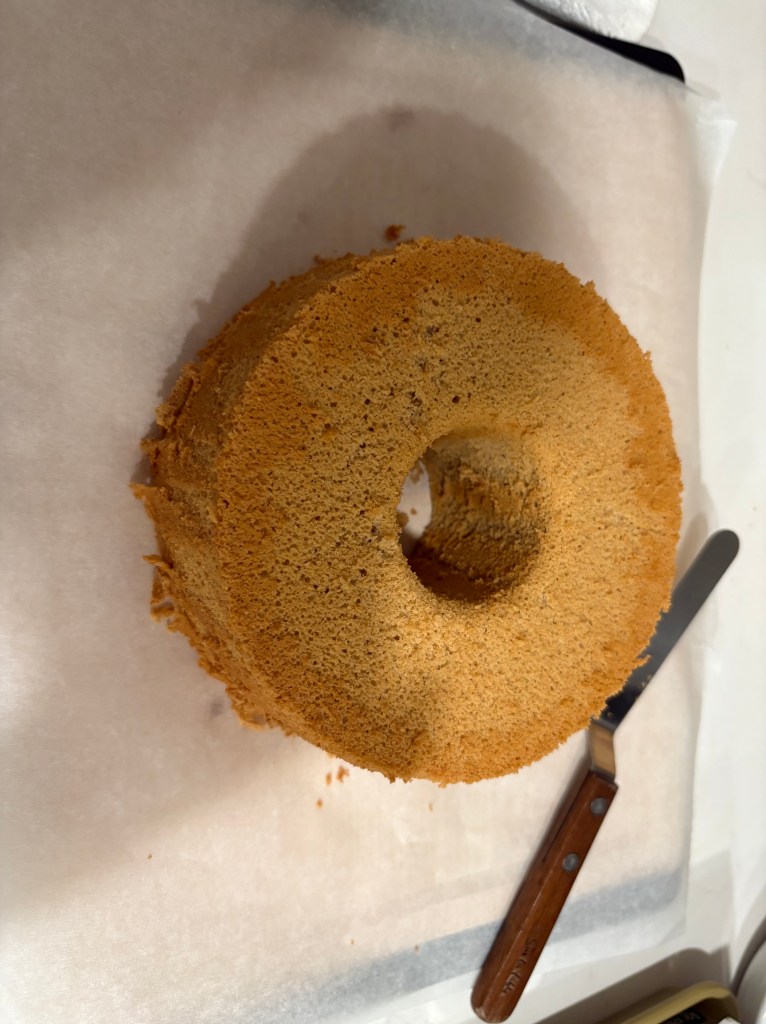
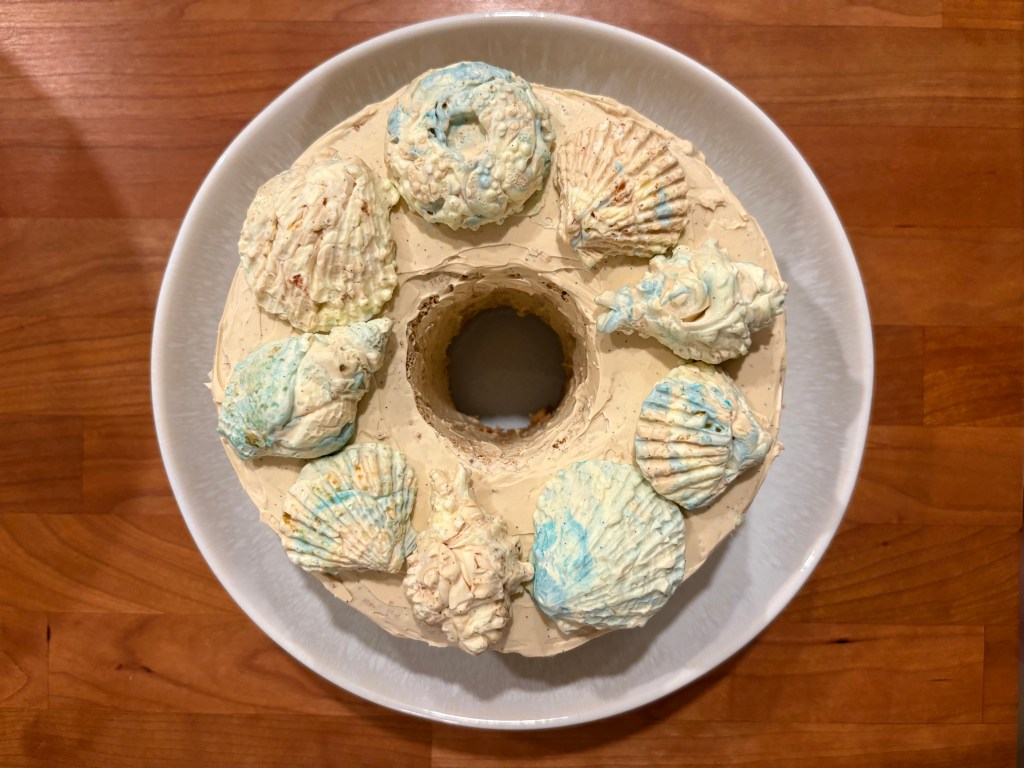
In brief, the cake I was making was a coffee chiffon cake frosted with coffee Swiss meringue buttercream and decorated with Swiss meringue buttercream seashells.
Rationale and notes:
Cake Type:
I chose chiffon cake, selfishly, to be honest. Earlier this summer, I had finally bought the chiffon cake pan I’d been eyeing for some time, and wanted to continue practicing baking them. My parents are also partial to lighter, fluffier sponges and are incredibly sweetness averse, so I wanted to avoid denser, buttery cakes. Chiffon’s lightness was perfect for their preferences.
What is chiffon cake?
Chiffon is a light and airy cake that blends the richness of a butter cake with the fluffiness of a sponge cake thanks to its unique technique: oil (instead of butter) keeps it moist, while the beaten egg whites give it lift and a delicate, tender crumb. Chiffon is baked in a tube pan, which also helps support its rise, since the center allows for heat to reach the middle, and the tall walls support the airy batter as it bakes, Chiffon cakes are versatile, delicate, and not-too-sweet—perfect as a base for citrus, vanilla, or other light flavors.
Flavoring:
I decided to go with a double coffee cake since my dad, like me, loves his coffee. My childhood mornings smell like my dad’s classic Folgers roast, which he will brew without fail everyday before the sun, and everyone else in the house, rises. Even on weekends, he’ll be up in the early AM, putting a pot on before working on his garden.
Not a coffee lover? No problem! It is very easy to make this cake with different flavor profiles. All you have to do is substitute the coffee flavoring add-ins with different flavoring of your choice (vanilla bean, lemon zest and juice, earl grey, matcha/hojicha, etc.)
Note: If you are substituting with a powder/ solid, then replace the liquid coffee element for water or milk, and replace 2-3 teaspoons of flour in the recipe for your flavoring powder instead.
Importance of buttercream:
To make the seashell elements of this cake, it is important to use a buttercream since molding the shells requires being able to cool down frosting enough to harden, which butter, and therefore buttercream, naturally does when refrigerated. Buttercream will also soften again to a delicious texture when allowed to sit out at room temperature, which was also key to this cake.
I decided to use a Swiss meringue buttercream since it is lighter and less sweet than an American buttercream. However, any buttercream would work really. To pick my buttercream type, I watched this video, which gives a helpful explanation of different types of buttercream.
If you are not making seashells and just out here to enjoy chiffon cake, I would recommend pairing your chiffon with homemade whipped cream or homemade honey whipped cream and fruit, or even just a dusting of powdered sugar. And for the devout minimalists, chiffon cake is also fantastic on its own.
Travel-proofing your cake:
My cake needed to be able to survive a 1hr 30min drive to the Point Reyes Picnic Area and another hour or so outdoor picnic. Thankfully, Point Reyes itself generally has cool, though windy weather, so even though it was summer, I could get away with the cake not melting. (Fun fact: According to this SF Gate article, this 2025 Bay Area summer is actually one of the coldest in decades.)
I have to say, eating cake outdoors is a vibe, so don’t be scared to do it. Here are some ways you can travel-proof your baby, I mean cake.
- While most cake types are generally movable, frostings are more sensitive, especially to temperature. If you know the weather will be hot, choose a more stable frosting like Italian meringue buttercream. I actually witnessed this firsthand when I saw the Italian meringue buttercream frosting of my wedding cake not melt throughout an entire Sacramento summer evening. Don’t choose a frosting like whipped cream, which would not only melt, but may also not be safe to keep unrefrigerated for long periods of time.
- Box it well. I used these paper boxes from Amazon for my cake. Cake carriers are also a great choice.
- Chill the cake overnight in the fridge, and let it come back up to temp during the travel time before eating. I put my cake in the fridge overnight and took it out the next morning. The buttercream slowly thawed from cold and hard to soft and fluffy by the time we were ready to eat cake at early noon.
Recipe credits and adaptations:
For the chiffon cake:
I used Just One Cookbook’s recipe for Earl Grey Chiffon but just subbed the liquid tea for an espresso shot and omitted the earl grey powder. I have been an avid fan and reader of Just One Cookbook ever since it changed the way I view and make Japanese curry. For chiffon cake, I also preferred this recipe over others I researched and tried for the shorter bake time (only 30 mins), and Nami’s in-depth explanation of Japanese chiffon cakes. One helpful section especially is the conversion guide for different sizes of chiffon cake pans.
For the Swiss meringue buttercream:
Swiss meringue buttercream is actually very popular on Instagram and it is incredibly easy to find video shorts of people making this. The recipe I followed however was Claire Saffitz’s Dessert Person video. (She also does Italian meringue in this too.) While I mostly followed her Swiss meringue tutorial, I made a couple changes to better suit my purposes:
- I still added a vanilla bean, but subbed the vanilla extract for a shot of espresso (cooled to room temp). I do recommend still adding vanilla even though you are flavoring with coffee. The vanilla actually brings out the complexity of coffee a little more.
- I omitted cream of tartar (just didn’t have it at home). My meringue still stabilized and was able to get to stiff peaks.
- I used a hand mixer instead of a stand mixer. Now Claire prefaces her instructions with the warning that she would not recommend making this without a stand mixer, and boy she was right. I really got an arm workout in (oof). But, that being said, if you don’t have a stand mixer like me, it is possible to do it.
Side Note: Why don’t I have a stand mixer?
A while back when I was looking to buy an electric mixer, I debated a stand mixer, but due to my kitchen at the time constantly being on “storage is low” mode, I opted to get a quality hand mixer (I have the Breville Handy Mix Scraper in black truffle) instead and commit to getting in some quality muscle-building arm workouts whenever I baked. So far, I’ve been able to bake most things I want with just a hand mixer, and the limitations have also made me have to learn to do things like kneading bread by hand.
For the buttercream seashells:
I was inspired for this part by something I found when planning a summer bbq with friends menu. When looking into compound butter ideas, I stumbled across this very aesthetic recipe from Rosanna Etc. for seashell compound butter. I went ahead and bought the exact same seashell silicone molds, and thought: hey, if it works with butter, maybe it’ll work with buttercream in a similar way.
Materials
- Chiffon cake pan 7-in.
- Here is the pan I have since Amazon really enables me to have an idea and immediately get the supplies to bake it the next day.
- Hand mixer or stand mixer
- Seashell molds
- Ah, the things you can get for two-day shipping.
- Kitchen Scale
- Optional, but nice to have, since the metric scale is more precise for ingredients, and JOC’s recipe measurements are way easier with it.
- Food thermometer
- Optional, but recommended so you can check that your eggs for Swiss meringue buttercream get pasteurized at 160 deg when double boiling
- Offset Spatula
- Optional, but recommended for getting the chiffon cake out of the pan and for frosting
Ingredients
Coffee Chiffon Cake
- 60 ml coffee or about 4 tbsp
- I used an espresso shot (3 tbsp) + 1 tbsp of milk
- You can also instant coffee granules dissolved in water/ milk. (In retrospect, I actually wish that I had done this so I could have gotten my dad’s favorite Folgers flavor using Folgers instant coffee.)
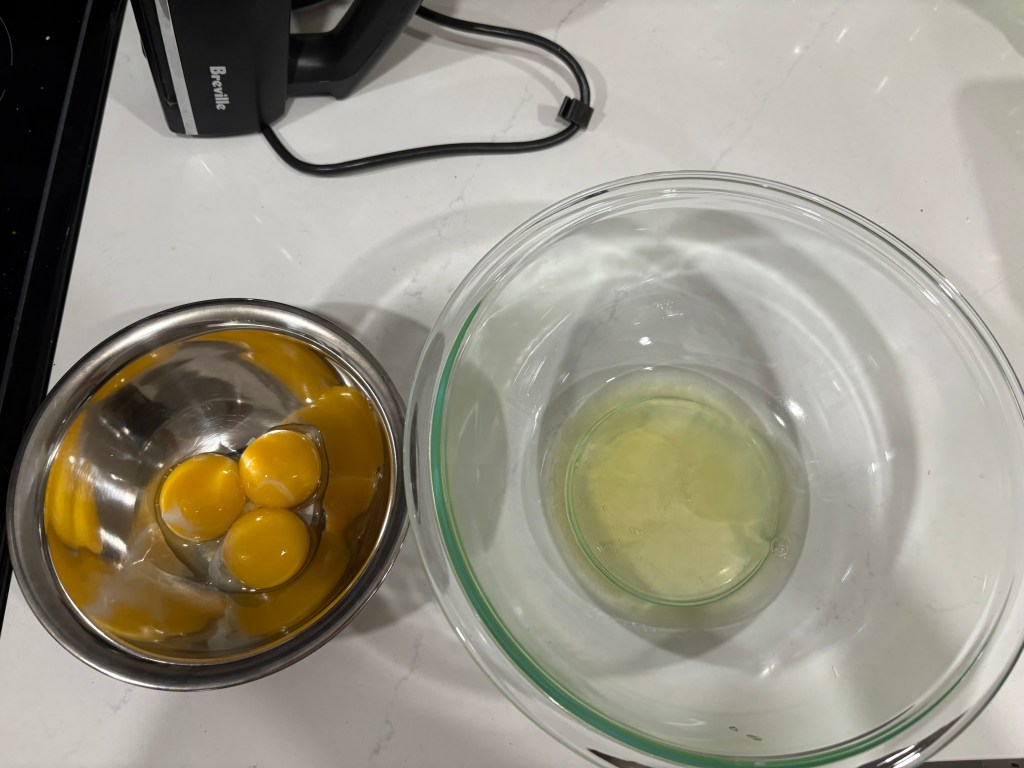
- 3 eggs
- separated yolks and whites
- 85g granulated sugar or 1/2 cup minus 1 tbsp
- 40ml neutral oil or 3 tbsp minus 1 tsp
- I used grapeseed, but go ahead and use whatever you have. It does need to be oil, however, and not butter. That is what makes it a chiffon cake.
- 75g cake flour or 2/3 cup minus 2 tsp
- You can hack cake flour by using AP flour and cornstarch. See here. I did not want to do the extra math, so I did not.
- 3g baking powder or 1 tsp
Coffee Swiss Meringue Buttercream (for frosting and seashells)
- 3 egg whites
- I used the spare yolks to make carbonara the next day.
- 3/4 cup of sugar
- pinch of salt
- 3 sticks of butter at room temperature
- I used Kerrygold. Fun fact: Costco sells Kerrygold in bulk, which is a great deal if you are a frequent baker.
- Put your butter out before you start your cake so it gets to room temp
- 1 vanilla bean
- 3 tbsp espresso or dissolved instant coffee in water
- Food coloring in desired shell colors
- You can even use natural food coloring products like this one, or even make your own food colorings from natural ingredients you have.
- I used the base vanilla buttercream (for white/ cream), coffee buttercream (for brown), and blue food coloring, and extra liquid espresso + cocoa powder to create some more details
Ideas for DIY natural food colorings:
- For blues: butterfly tea powder
- For lilacs/ lavenders: blueberry powder or juice, beet juice
- For pinks: pomegranate juice, strawberry powder
- For oranges: sweet potato puree, carrot powder or juice
- For darker browns: Espresso powder, cocoa powder
Instructions:
1. Make the Chiffon Cake
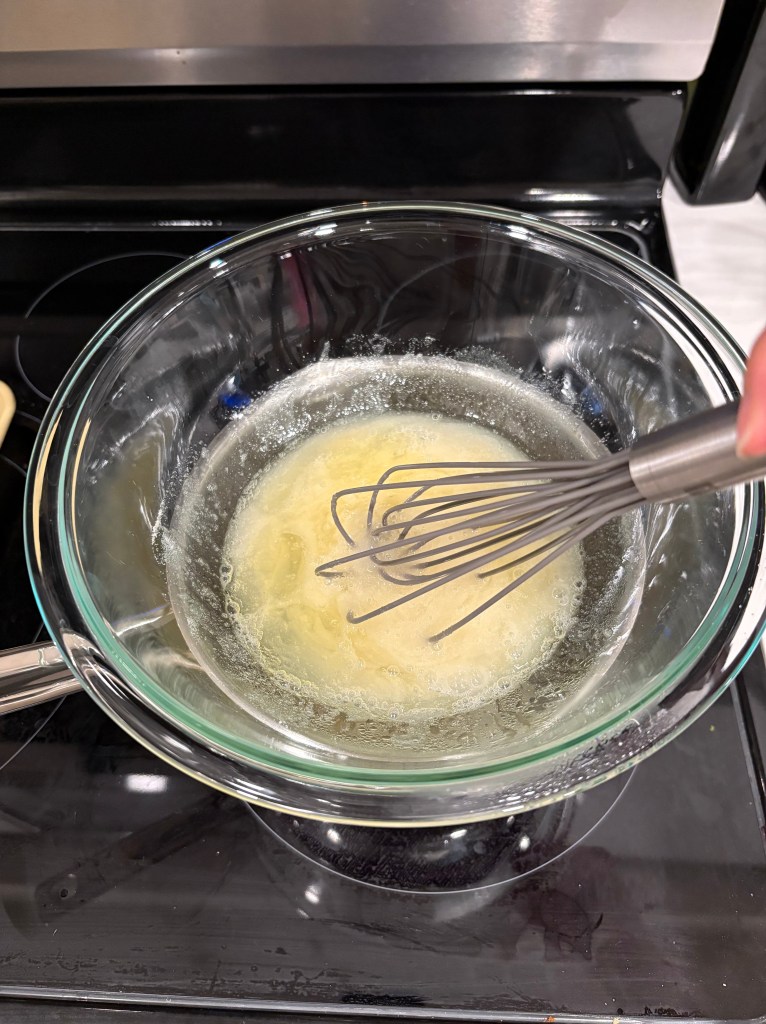
1. Pull an espresso shot OR add 90ml hot water to 1-2 tbsp of instant coffee and mix until blended. Let the coffee flavoring cool to at least room temp while you measure out other ingredients.

2. Separate and yolks and whites of 3 eggs into two bowls. Yolks should go into your main cake mixing bowl. Whites can go into a bowl for whipping meringue, and be refrigerated so they are cold for when we next need them.

3. Combine 1/3 of the granulated sugar with the egg yolks and whisk by hand so the mixture is a nice butter yellow.
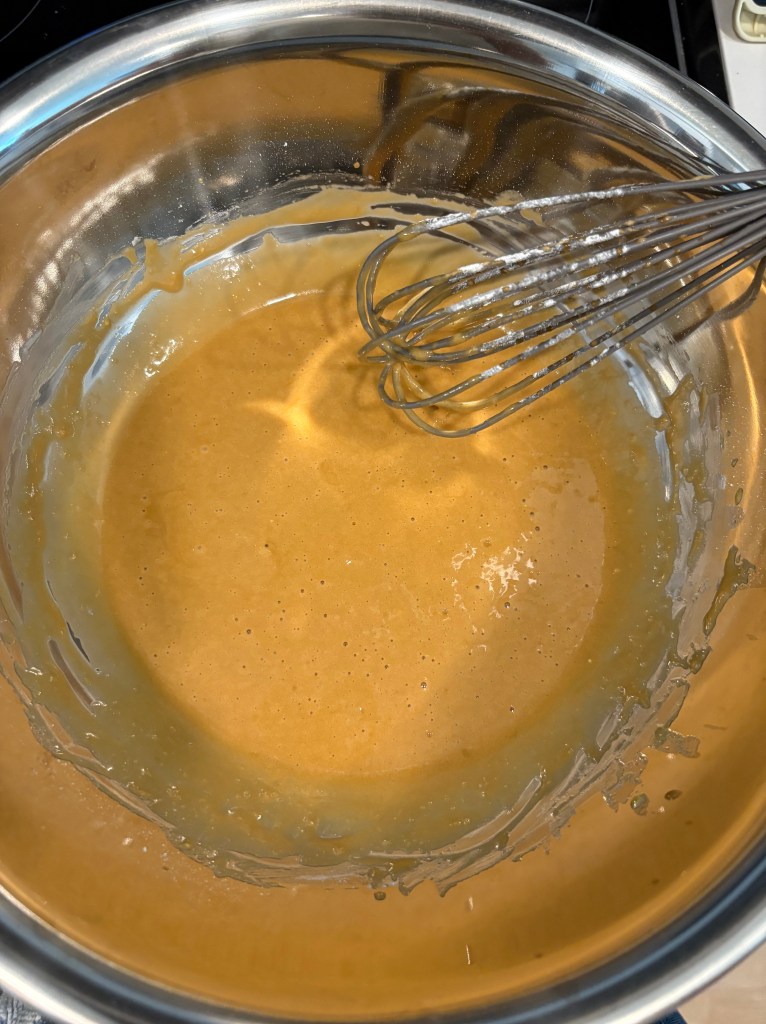
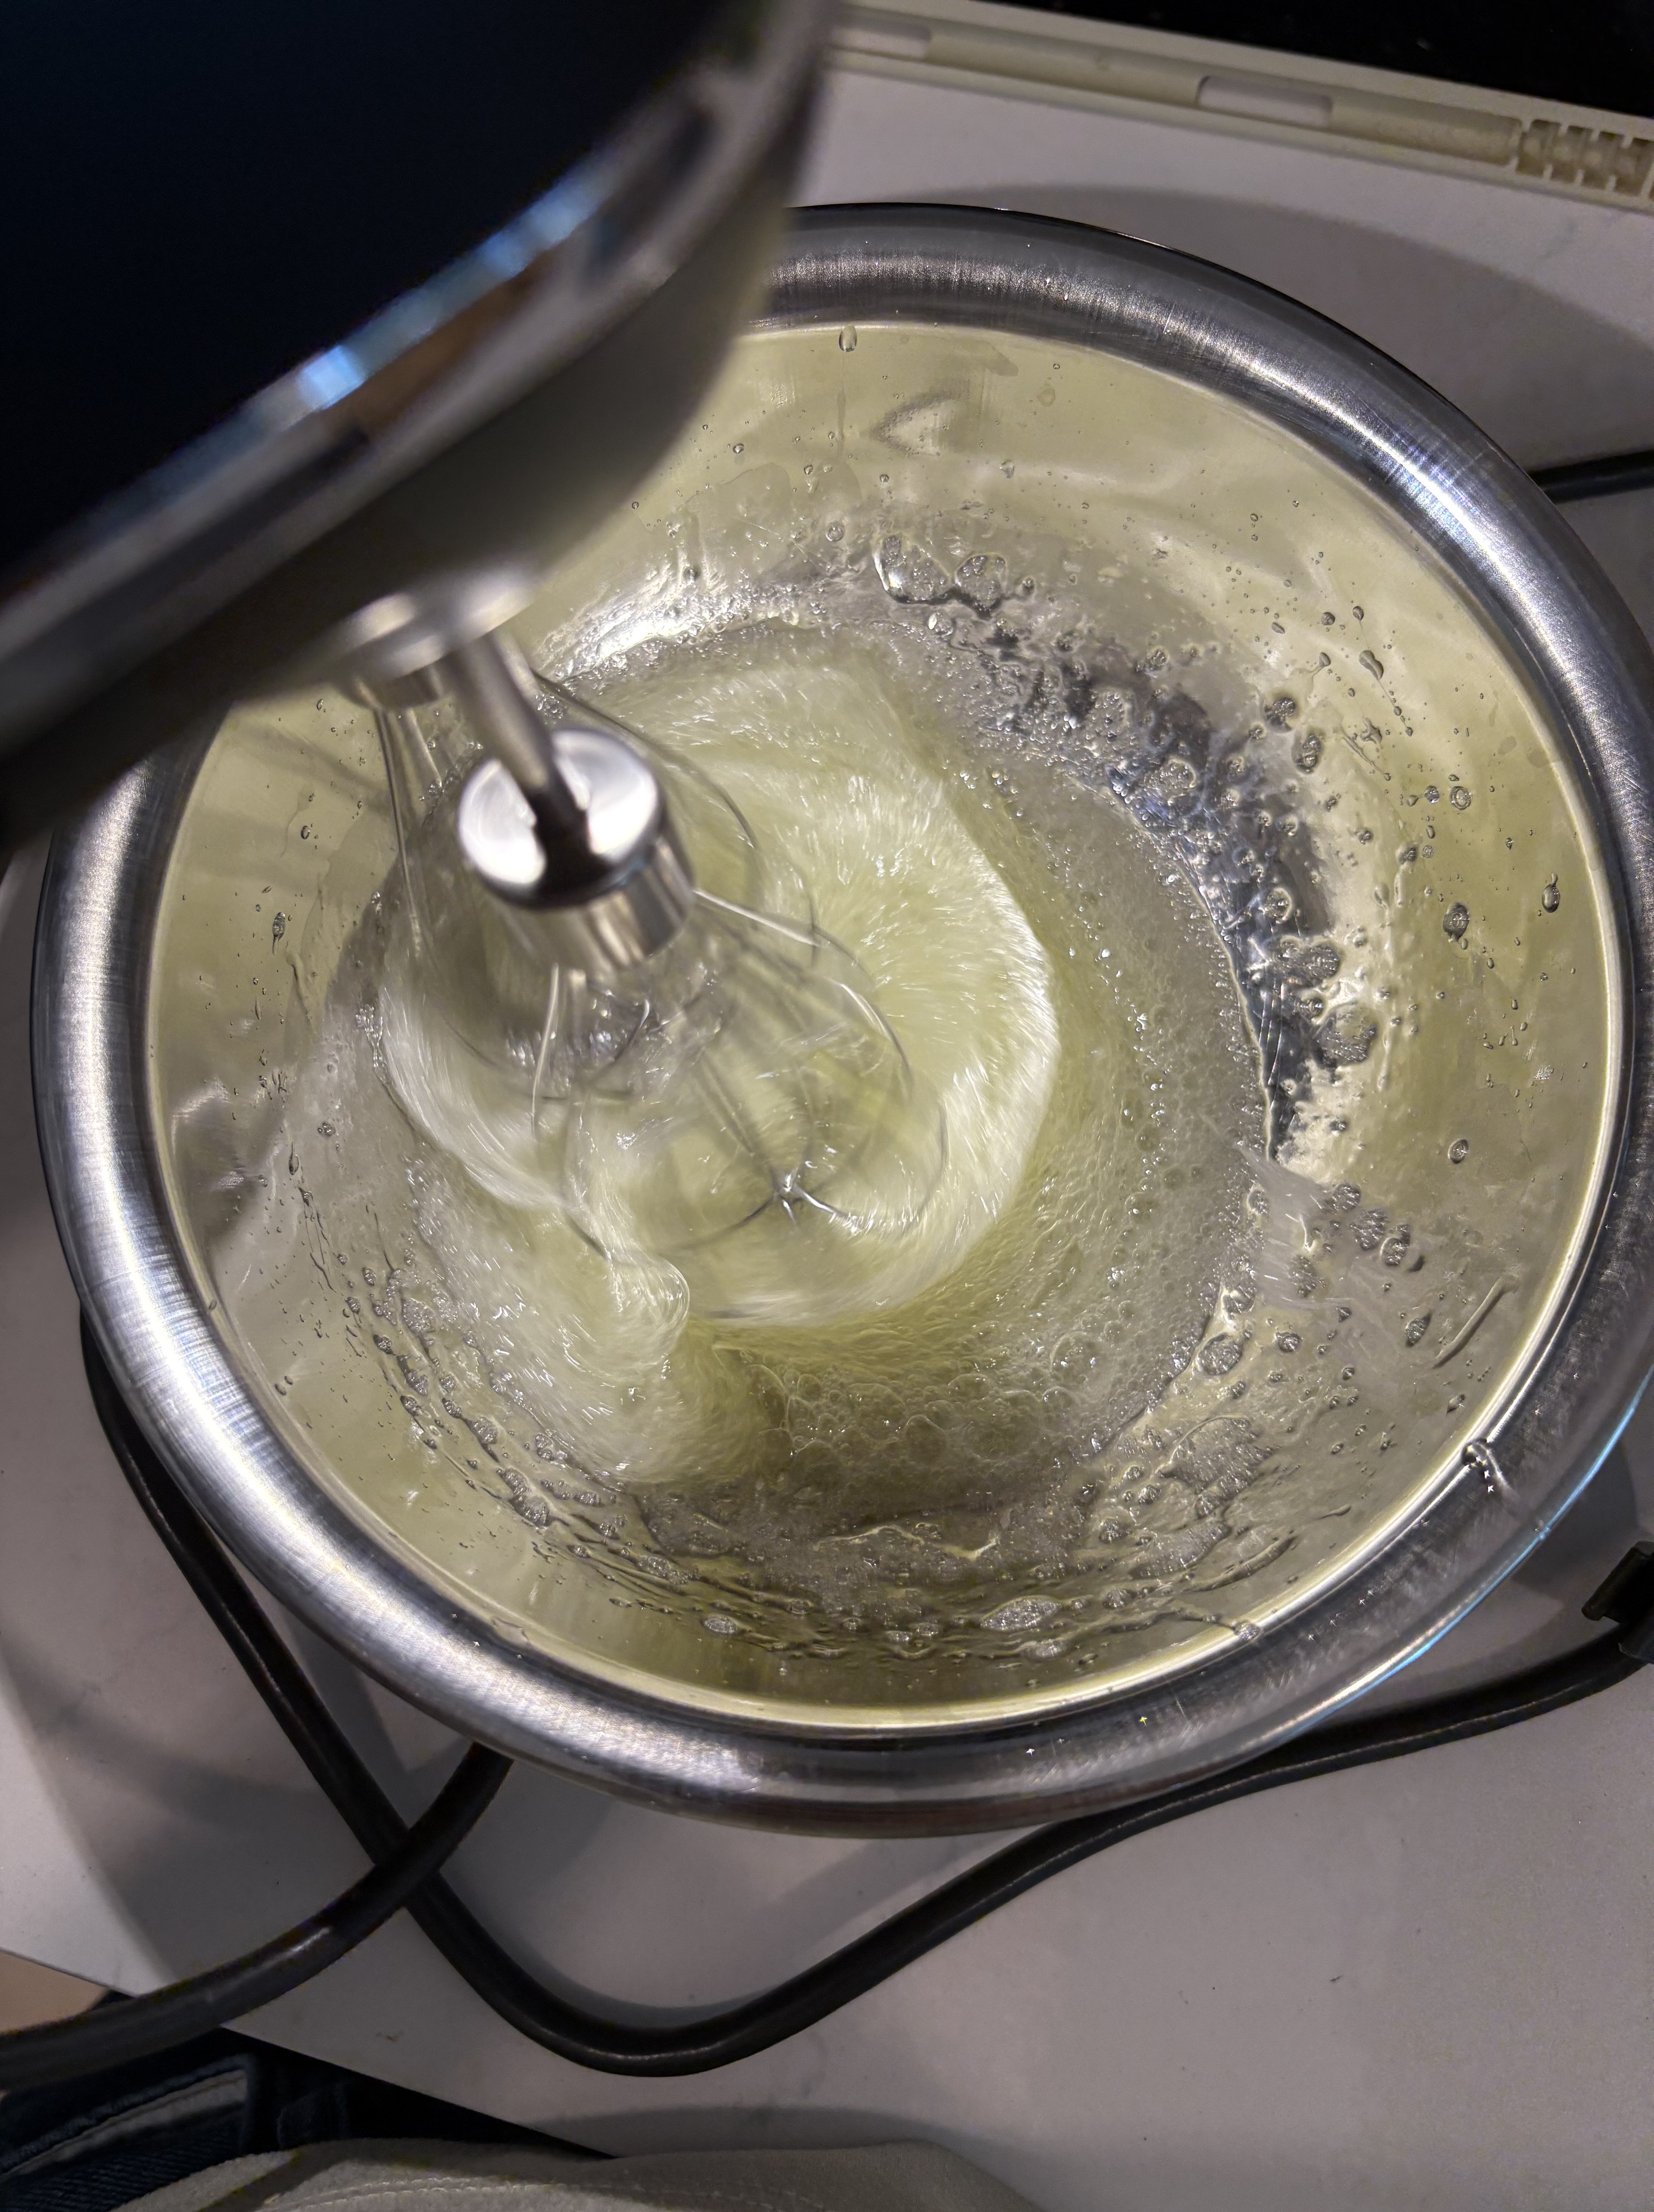
4. Add the oil and room temperature espresso shot to the yolk mixture and mix.

5. Sift in the flour and baking powder and mix to incorporate. Set aside while you make meringue.

6. Pre-heat your oven to 340 degrees Fahrenheit. If your oven takes longer to pre-heat, you can start it earlier than this step.

7. Make the meringue: Take the egg whites out of the fridge and beat at med-low speed until they get opaque and foamy. Increase your mixer speed to high, and start adding the rest of the granulated sugar in small sections at a time. Keep going until you finish all the sugar and you reach stiff peaks with your meringue.
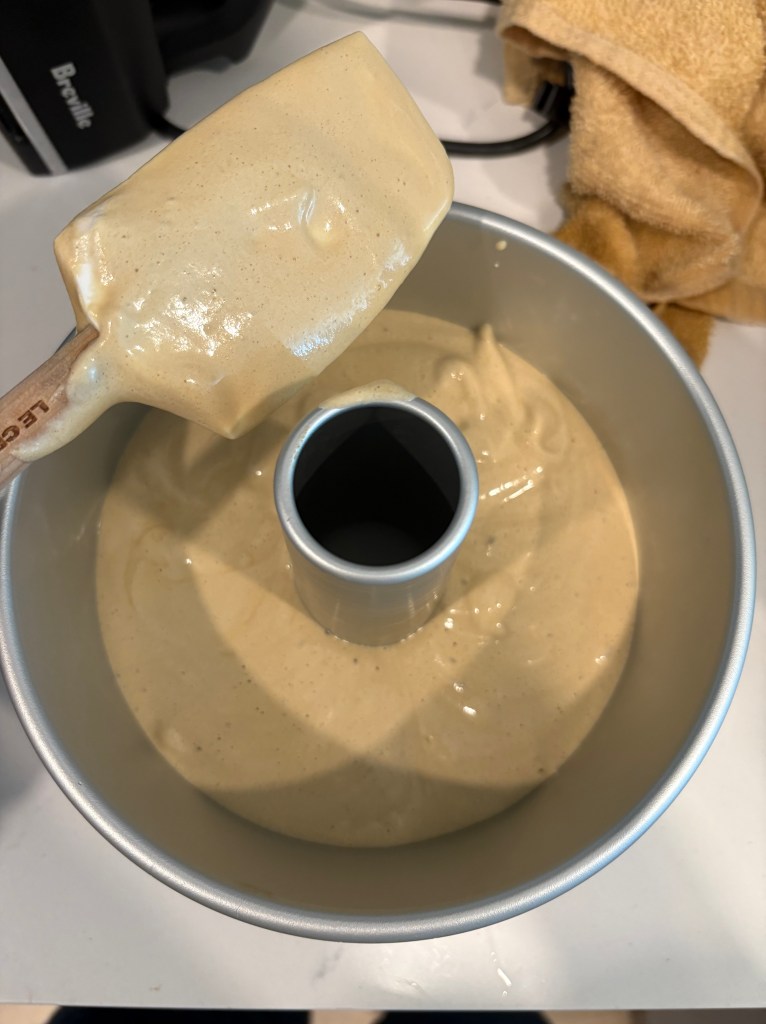
8. Use a spatula to take about a 1/3 chunk of the meringue and incorporate it into the cake batter to lighten the batter. Then scrape the rest of your meringue into the batter and gently fold until just well incorporated. Be soft with it to not deflate the air bubbles.
9. Pour the batter into the chiffon pan (do not grease). Jiggle the pan a bit to get it even, and you can even run a chopstick through it to pop air bubbles inside.
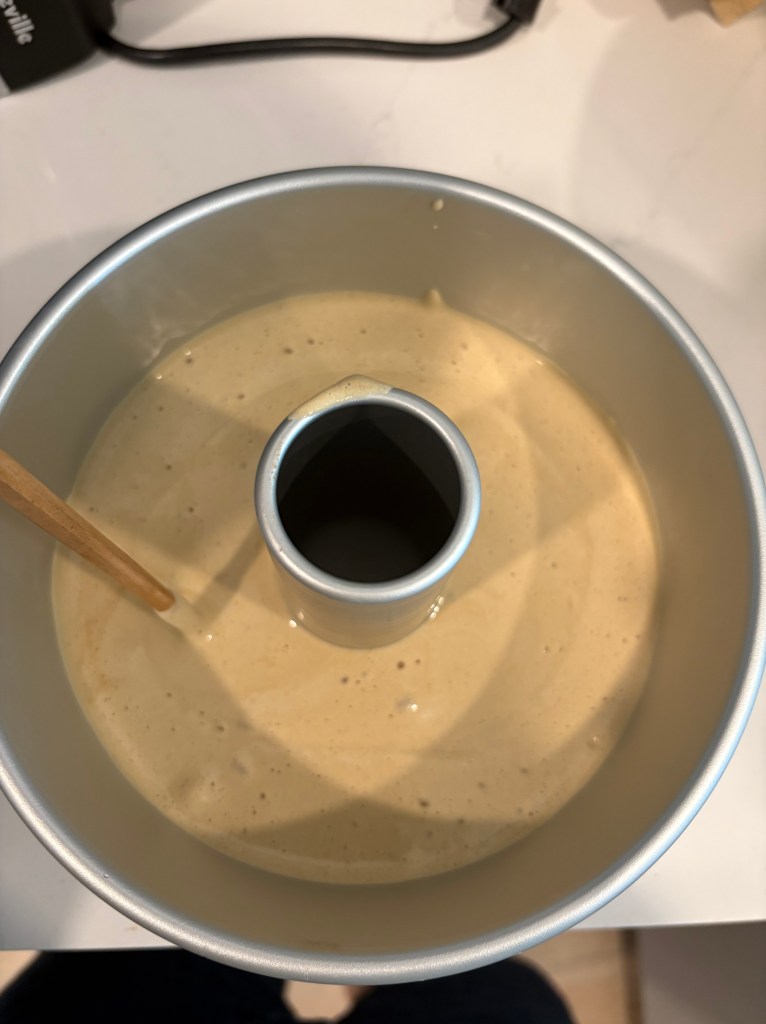
10. Bake on the middle rack of the oven for 30 mins.
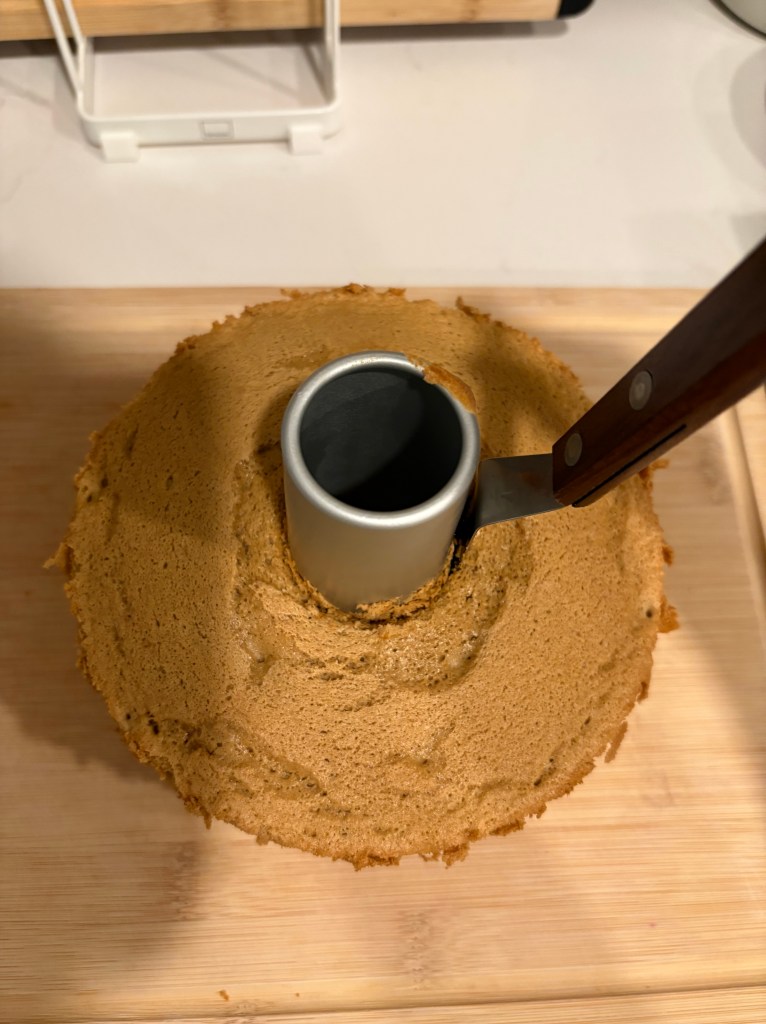
11. Take out of the pan, and poke with a skewer (or chopstick) to test doneness. Your poking utensil should come out clean.
12. Then immediately turn upside down (can be on a wire rack if you want) and let it cool completely in this inverted position. Gravity will help your cake keep its shape this way and not shrink. I let my cake cool for a couple hours while I did other things. In the meantime, you can start your buttercreams.
13. When your cake is cool, remove it from the chiffon pan with an offset spatula. You can run the spatula around the edges of the cake (inner and outer circles) and the top (where it meets the removable base) to help release it from the pan.
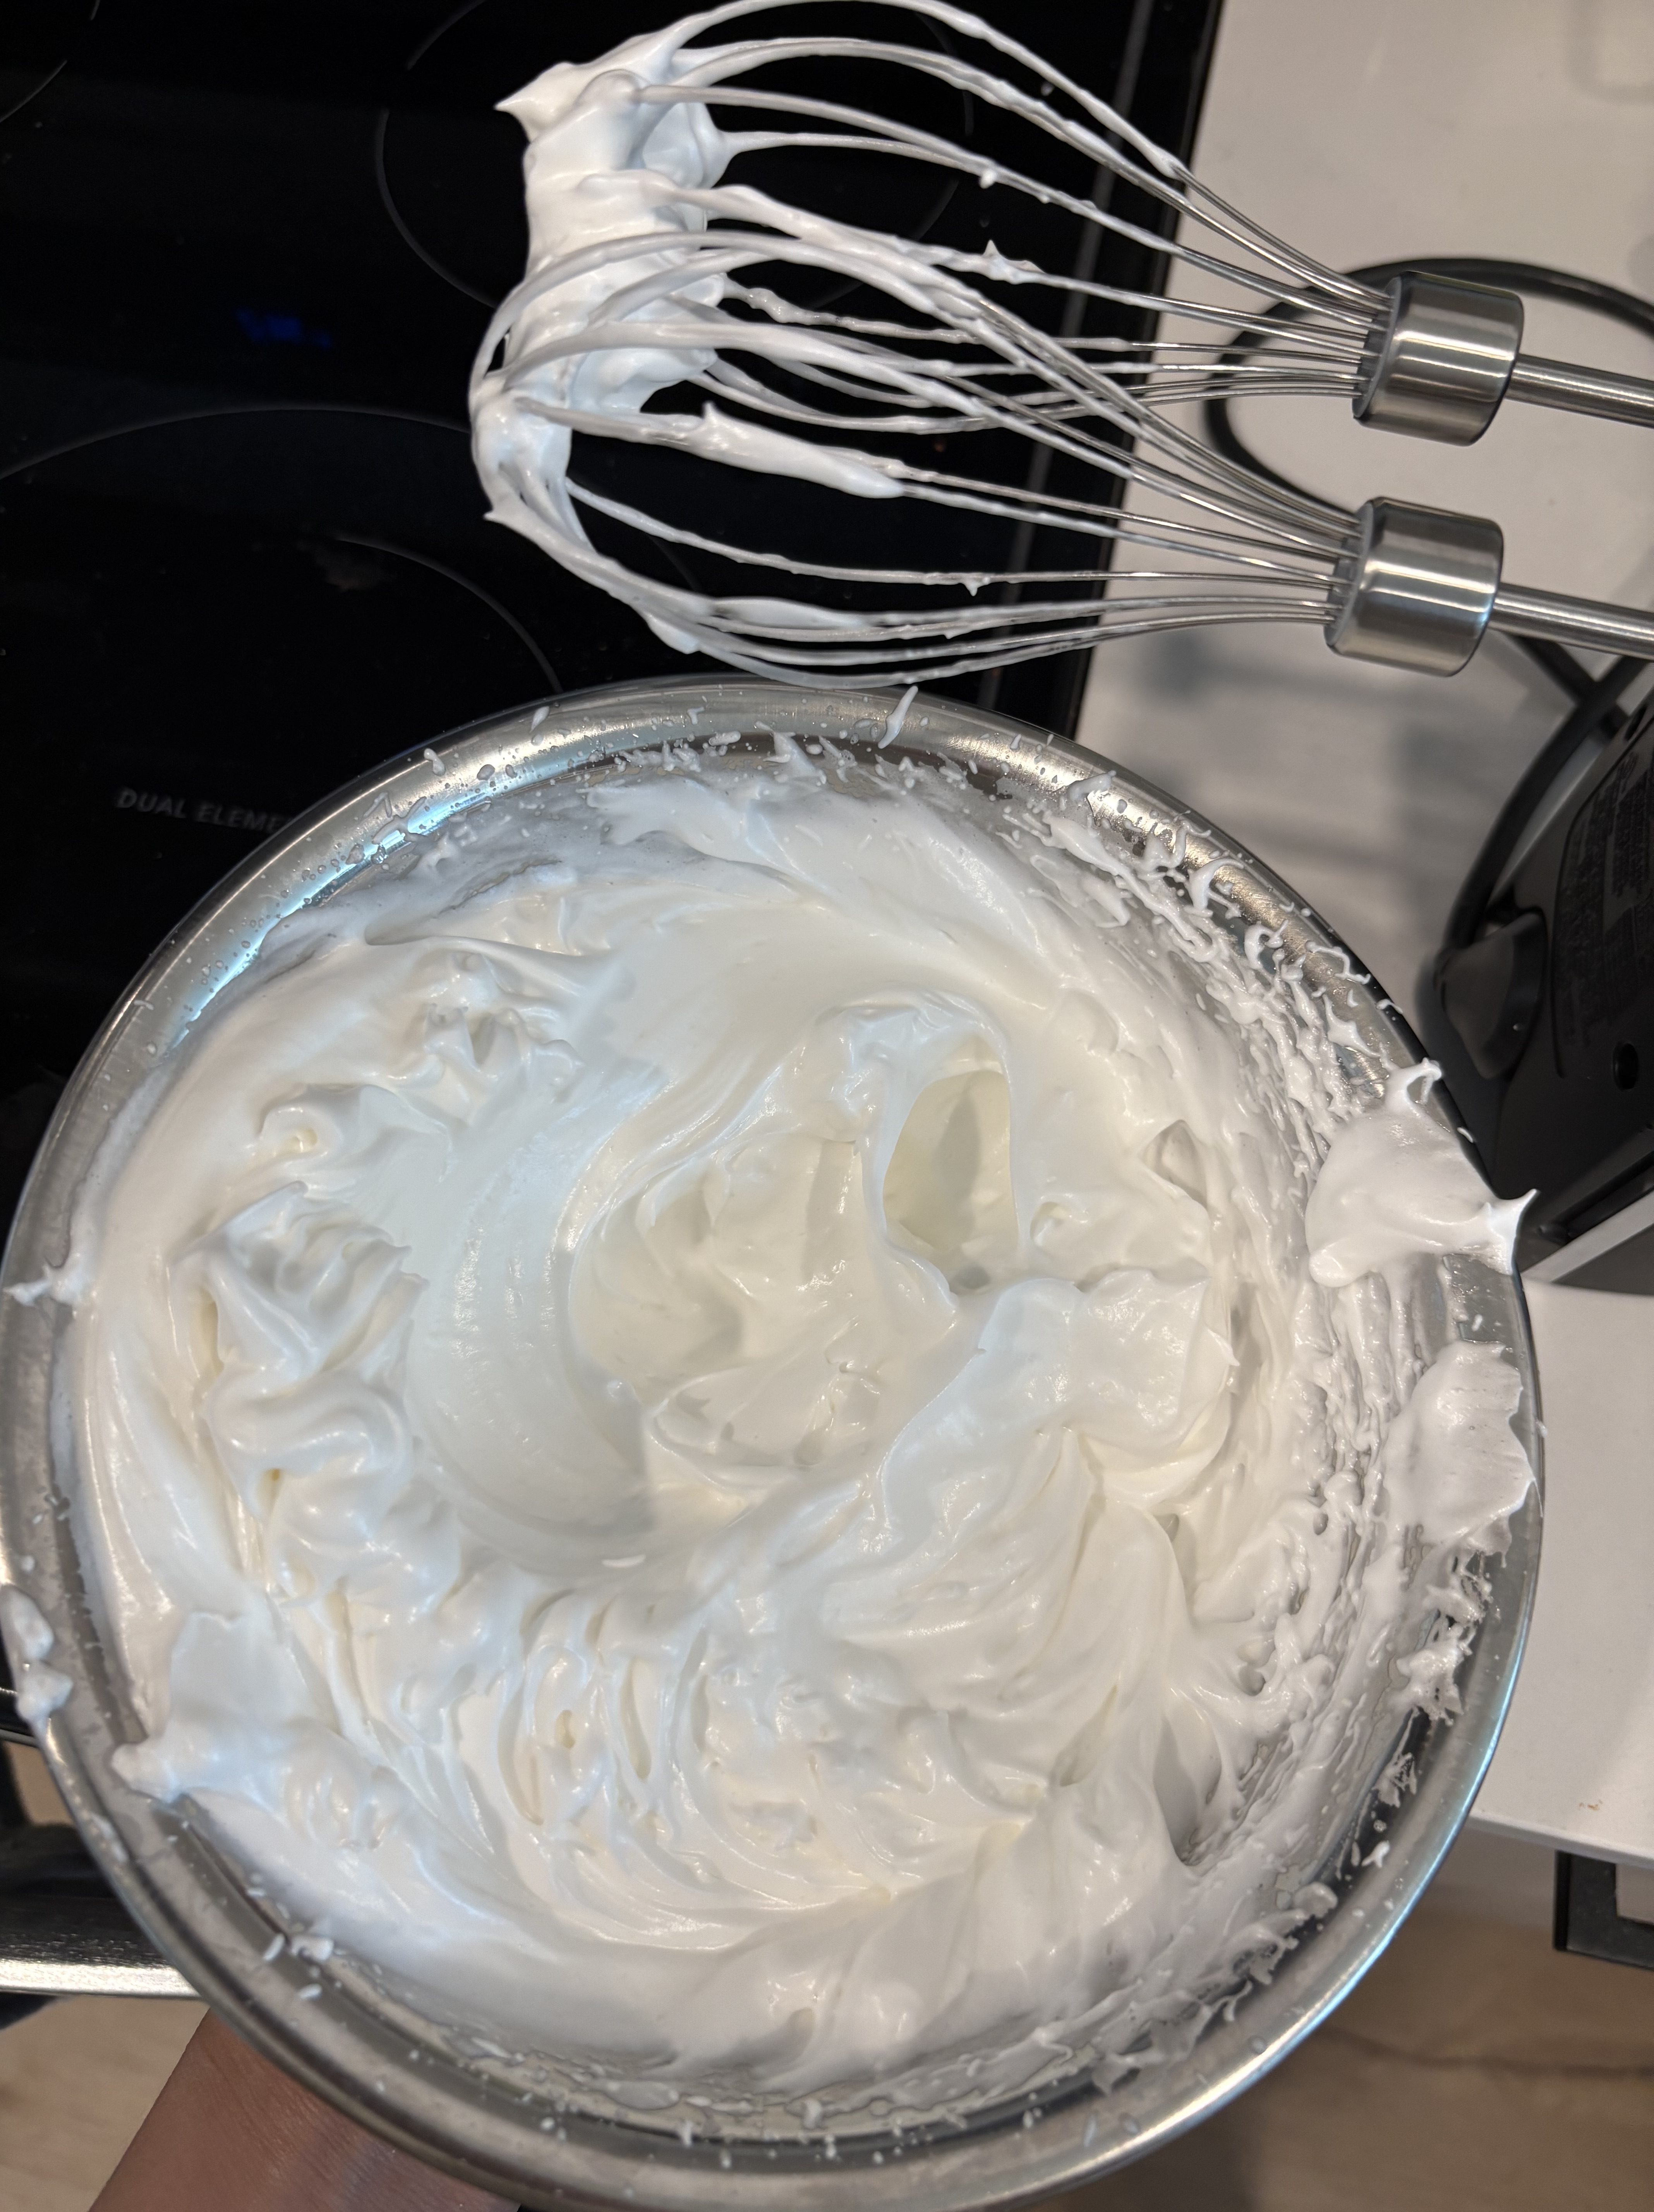
2. Make Swiss meringue buttercream
1. Fill a medium size sauce pan with water and get it to a gentle boil on the stovetop. In the meantime, prep your ingredients.
2. In a glass or steel bowl with a circumference a bit larger than the rim of your sauce pan, add your 3 egg whites, 3/4 cup sugar, and pinch of salt. Get a whisk ready.
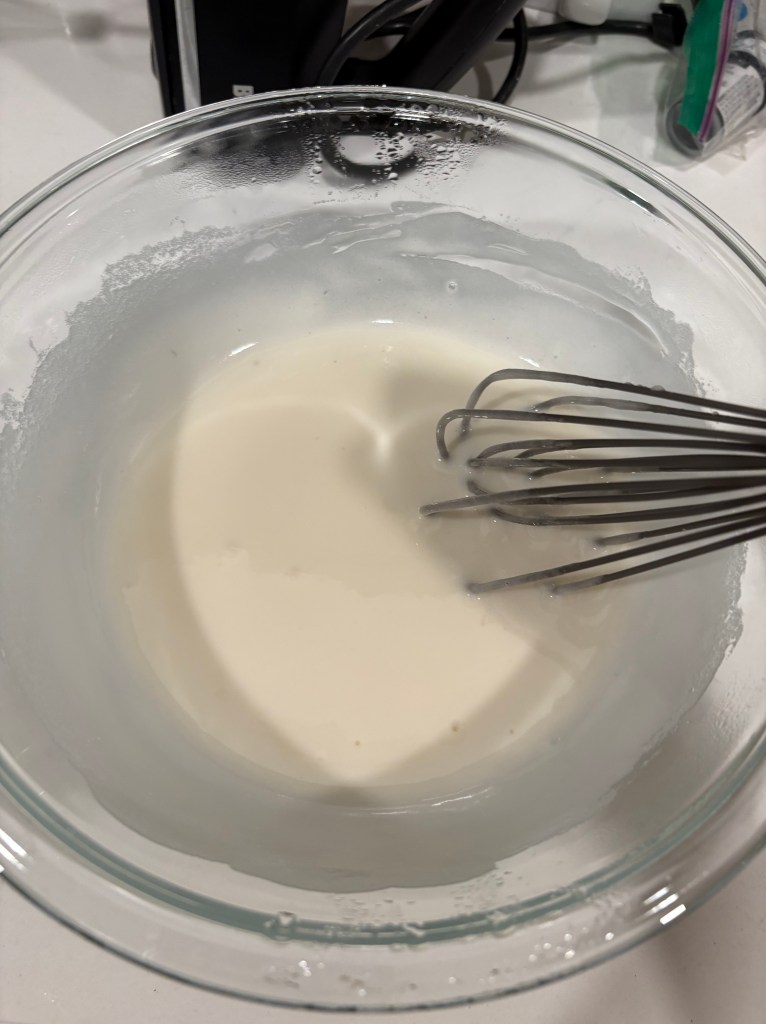
3. When the water is hot enough, begin double boiling your meringue mixture on the stovetop. Whisk constantly while double boiling, and keep going until the sugar dissolves into the egg and the mixture reaches 160 degrees (which will pasteurize your eggs). Check that the sugar dissolved by feeling a little bit of the mixture between two fingertips for any residual grittiness/ graininess.
4. Take the meringue bowl off the saucepan and switch to mixing with an electric mixer. You can beat it on med-high but be careful of accidentally spraying meringue. You want to beat until your meringue cools down to room temperature and you reach stiff peaks. (Note: with a hand mixer this will take a while)
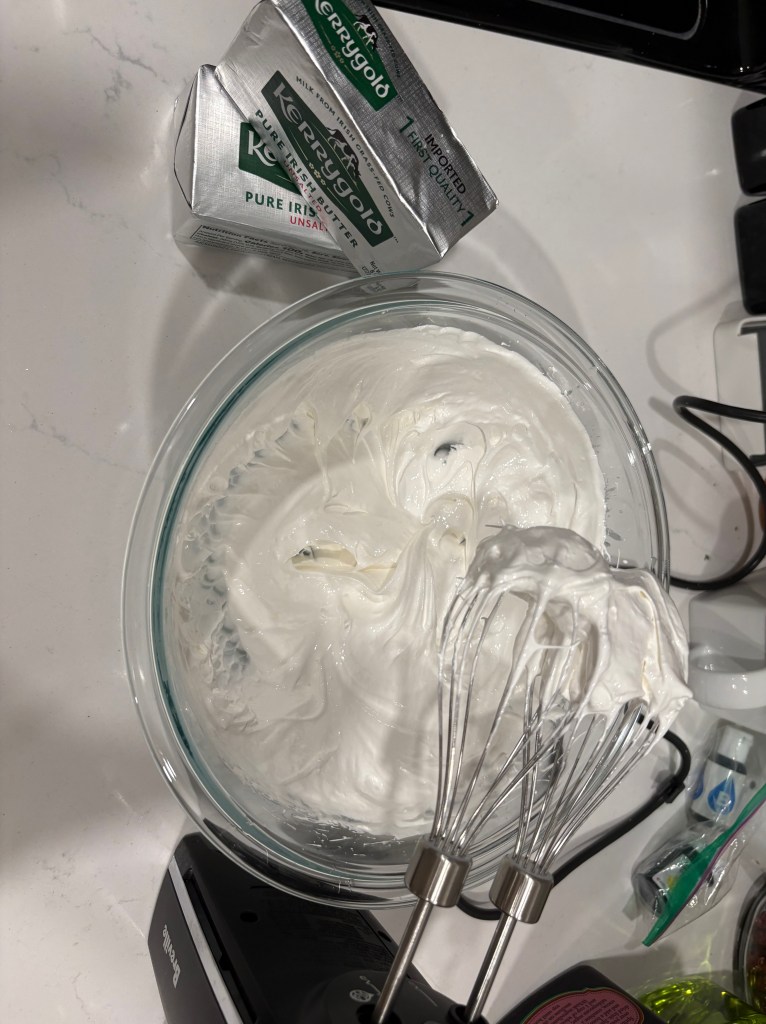
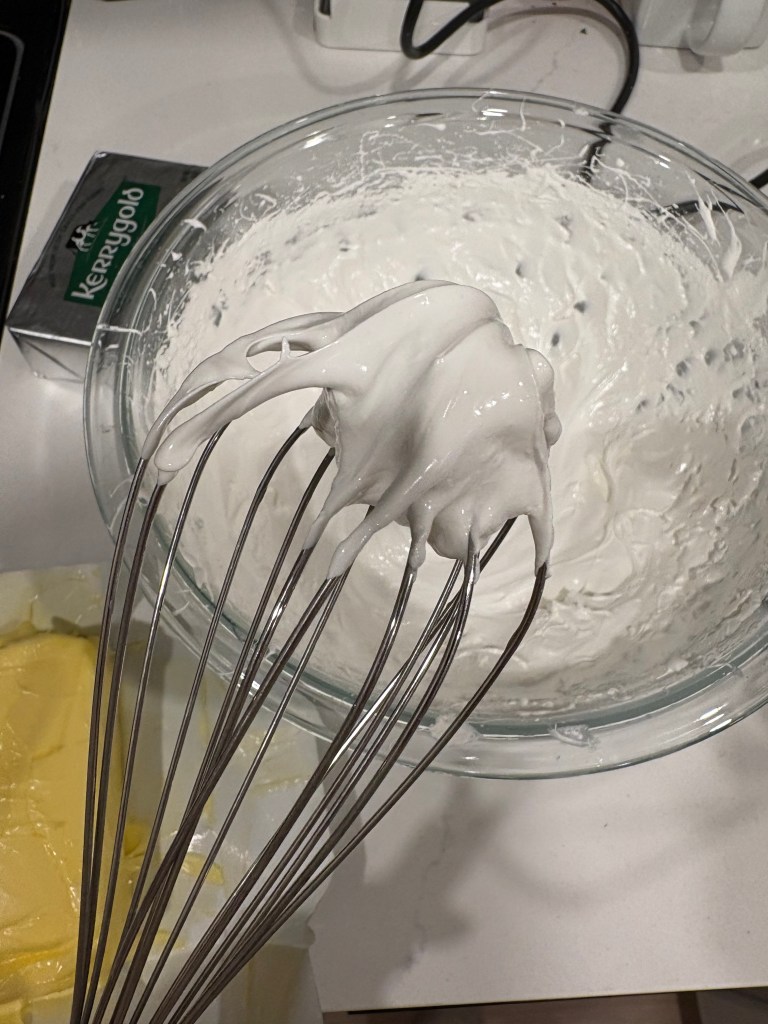
5. Once you reach stiff peaks and room temp, start adding chunks of butter (you can cube before hand, or just cut them as you go with an offset spatula like I did) one at a time into the meringue mixture. Make sure to fully beat one chunk of butter into the mixture before adding another. Once you finish all butter chunks you will have finished your meringue.
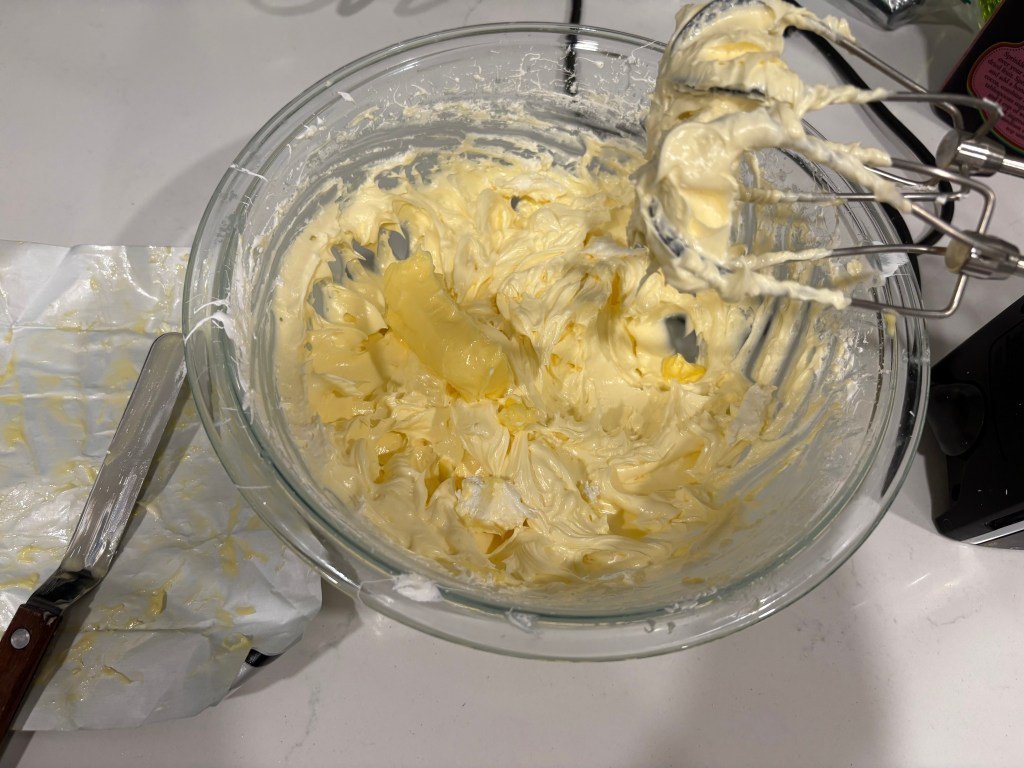
Note: This did not happen to me, but apparently you may get curdling during the butter adding process. This is normal and is supposed to resolve itself once you add all of the butter. Make sure you give enough time between steps for everything to be at room temp.
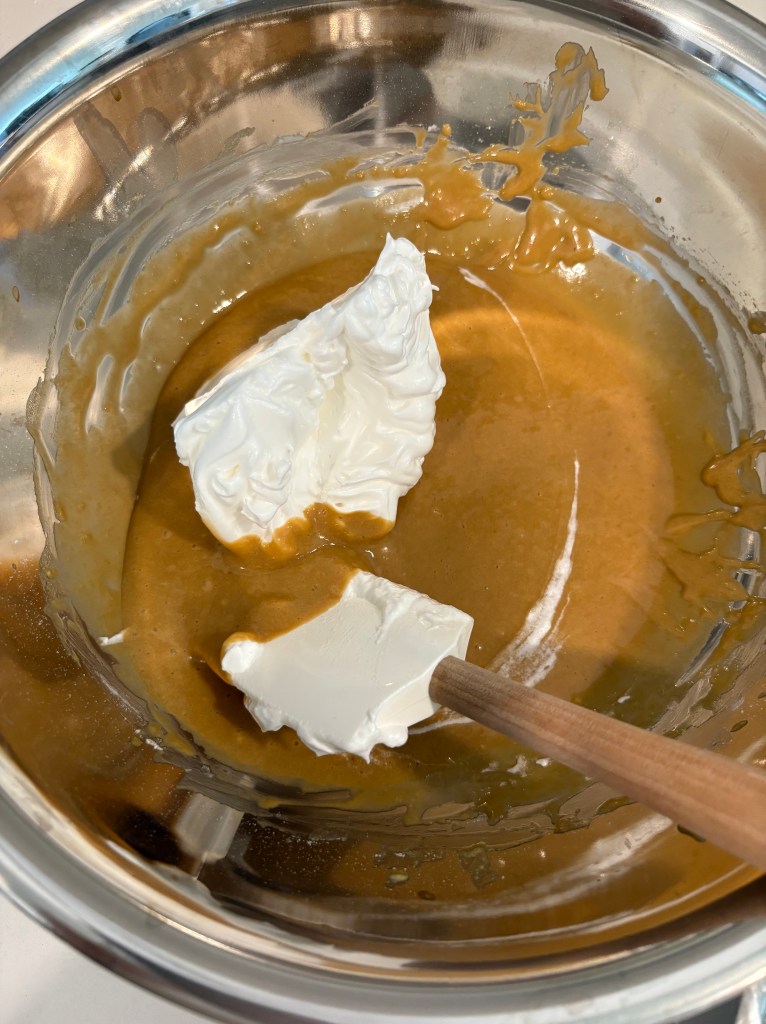
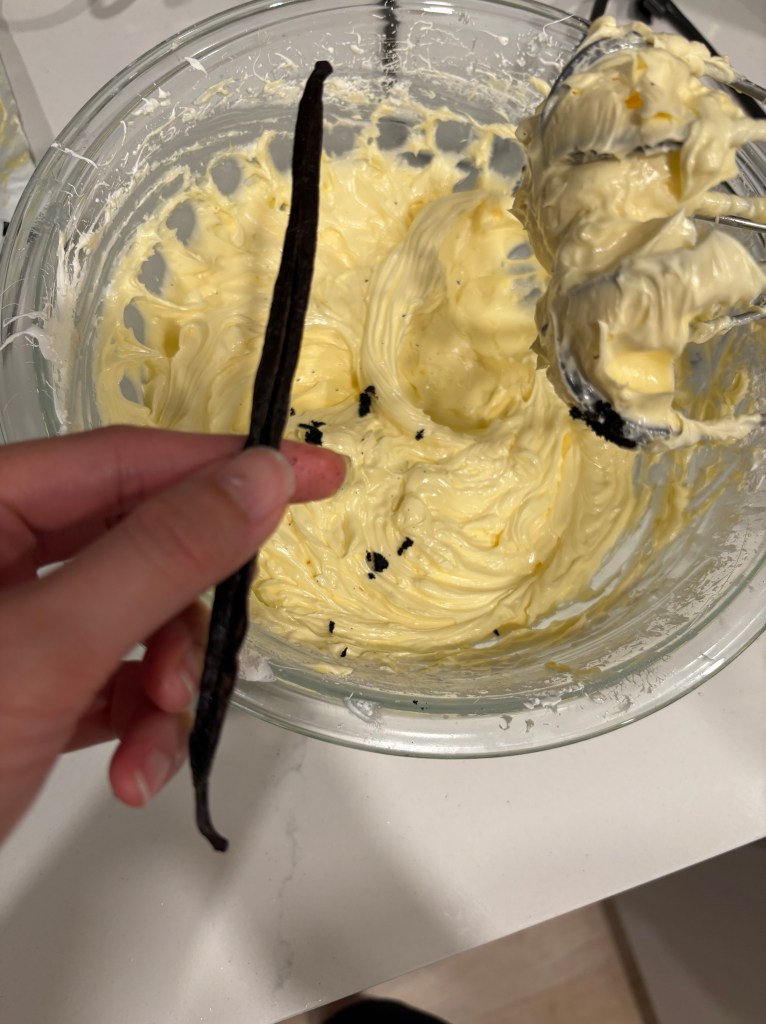
6. Open and scrape out the contents of one vanilla bean pod into the buttercream and mix in thoroughly. It should now be speckled, but still a cream color.
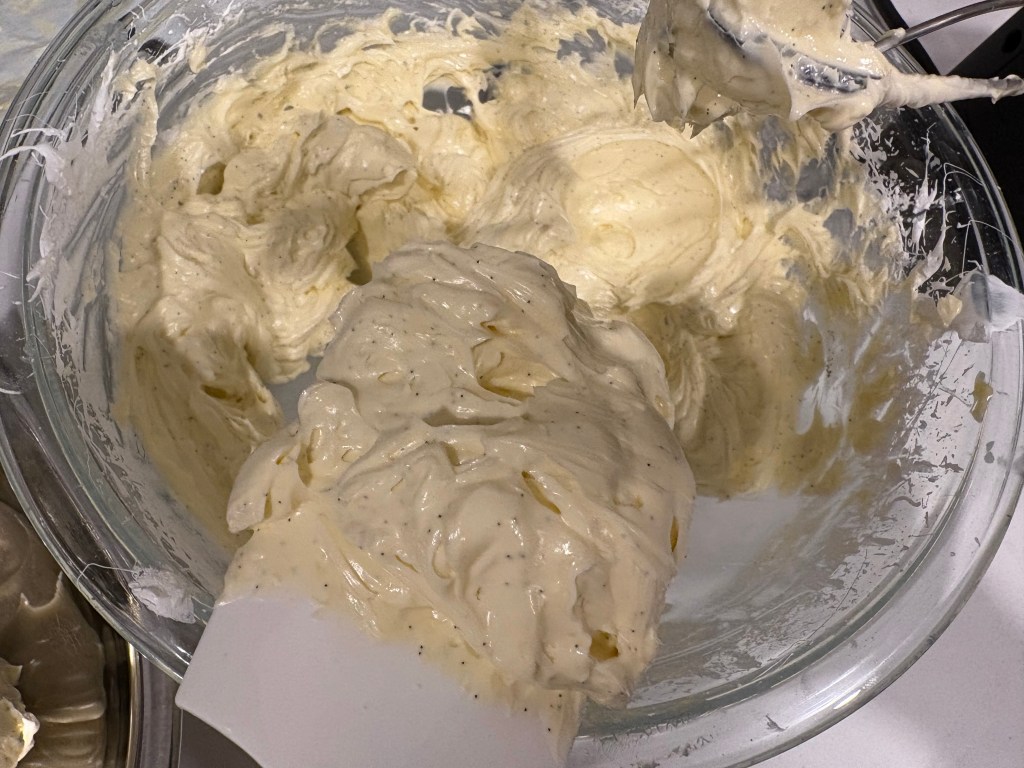
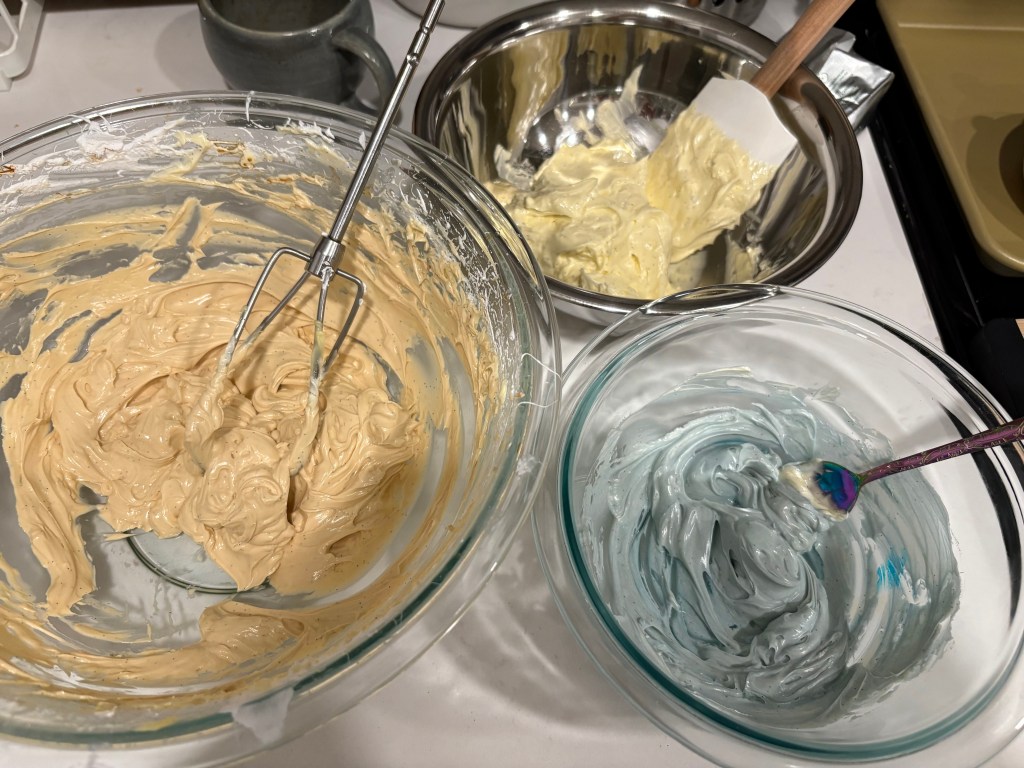
7. Reserve about 1/2 of the buttercream at this stage in a separate bowl.
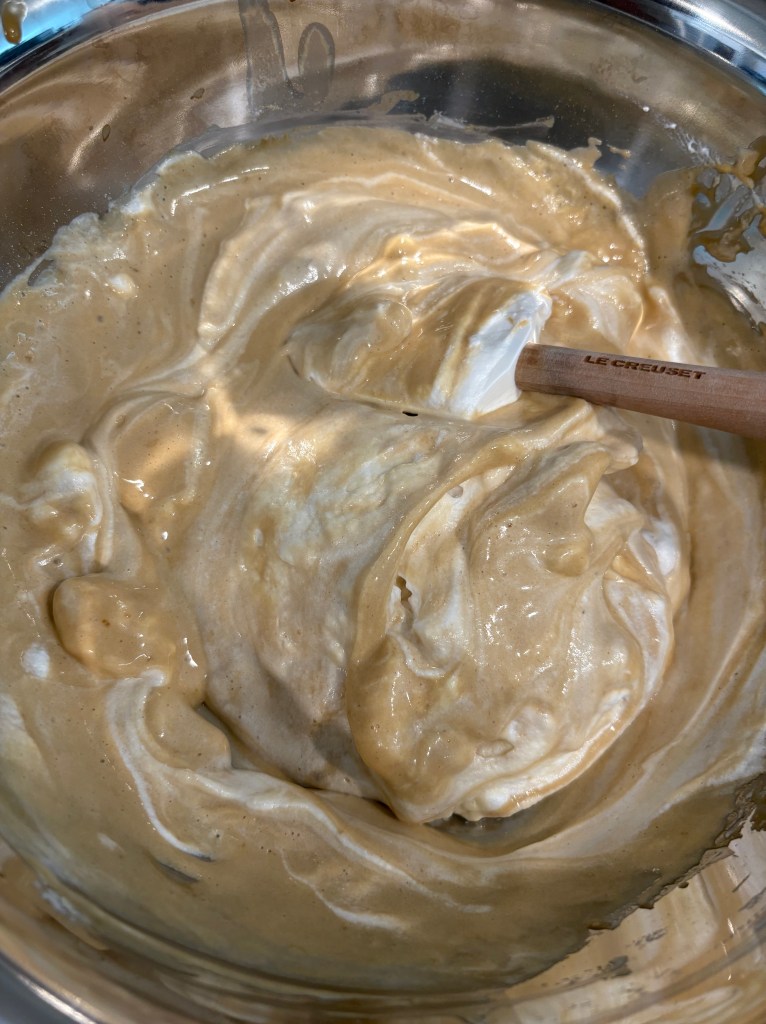
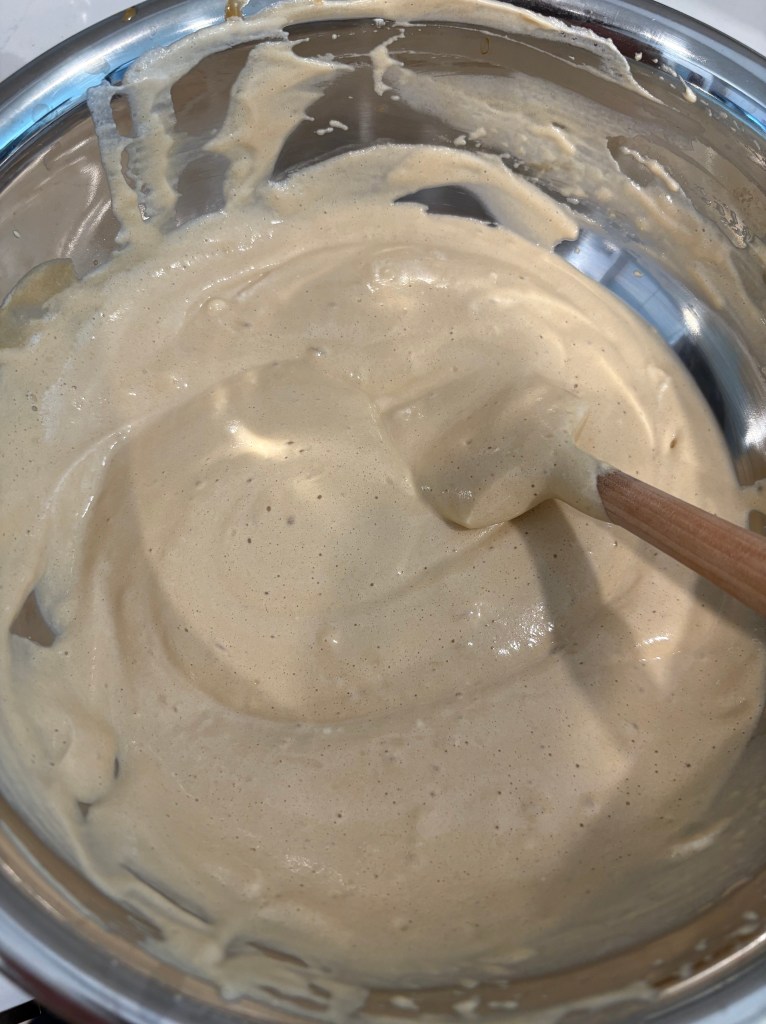
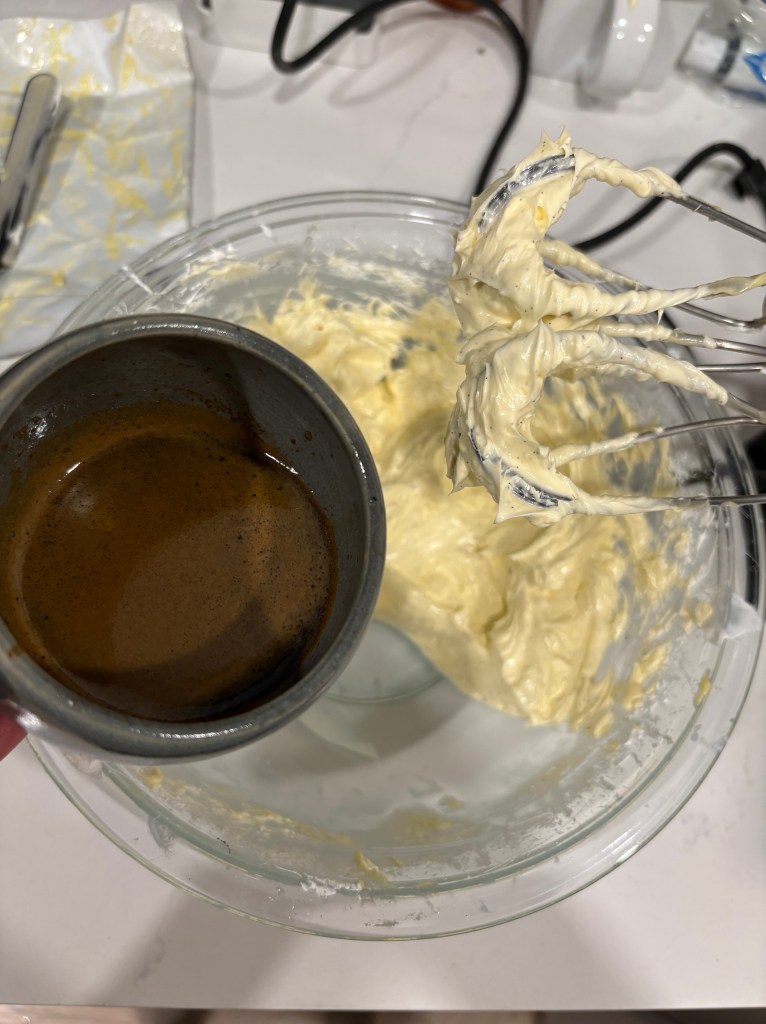
8. Then trickle in espresso into the non-reserved buttercream and mix. The buttercream should become more brown and develop coffee flavor. Be careful with adding liquids here and try to do small amounts at a time so that you don't accidentally add too much liquid or go more than the color you want.
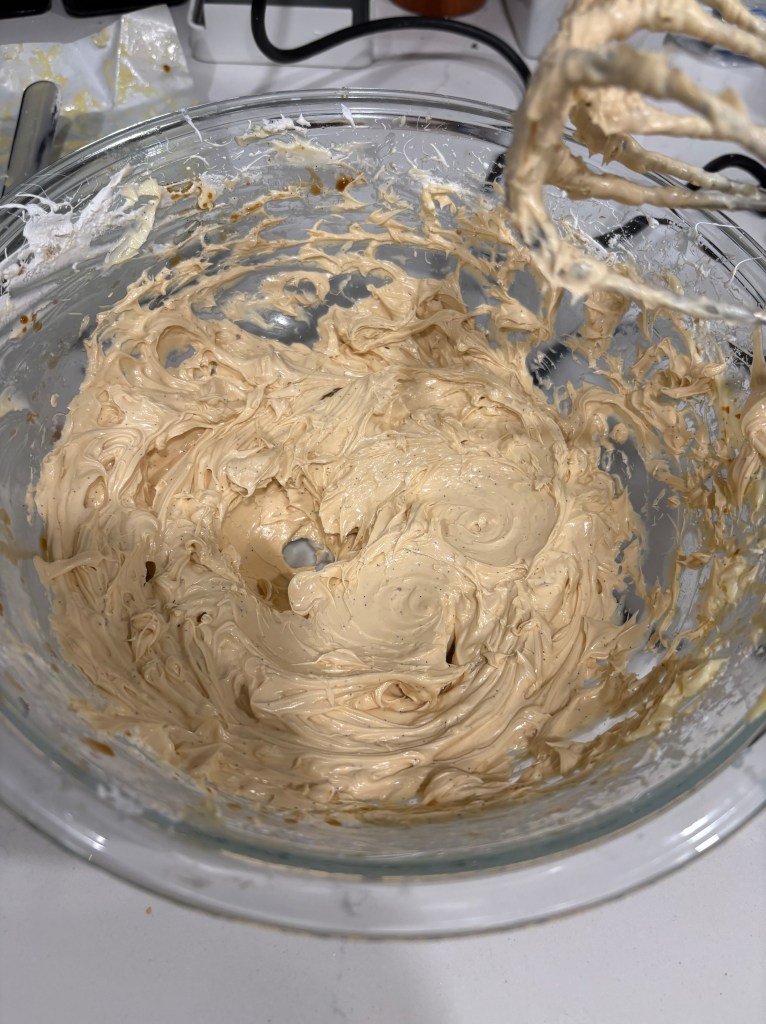
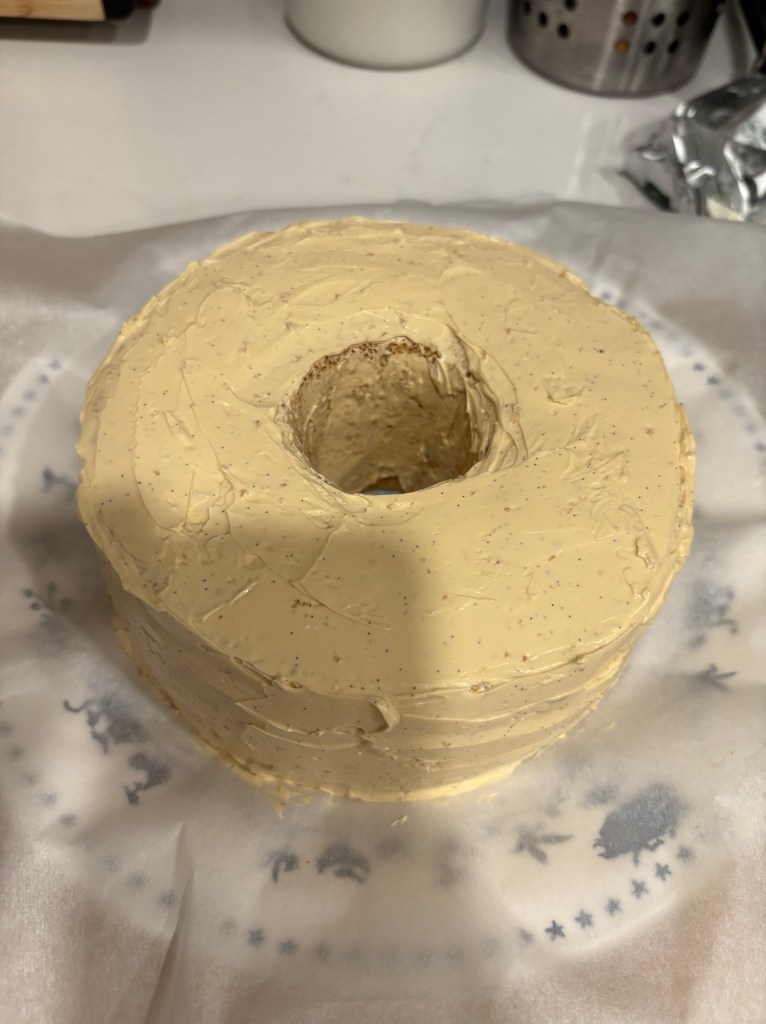
9. Use this coffee buttercream to frost the outside of your chiffon cake. I just did this with my offset spatula, but if you want it to be more even you can also use a cake stand. I did not mind the unevennesses since I wanted my cake to feel more homemade and natural anyway. You can even go for a naked cake look if you want it to be even more rustic, and use your extra cake crumbs to make a sandy look at the base. Save and set aside the extra coffee buttercream you have for seashell making.
3. Make buttercream seashells
1. Take about 1/4 of the vanilla (white) buttercream and put into another bowl. Add a drop or 2 of blue food coloring to color it to your preferred shade. Go less first, mix, and then add more if you want it darker. Of course at this stage, if you want to use different colors, go for it and split up the white buttercream into as many different colors as you want.
2. To make the shells, put some globs of each buttercream in different proportions onto a small dish and marble them with a chopstick.
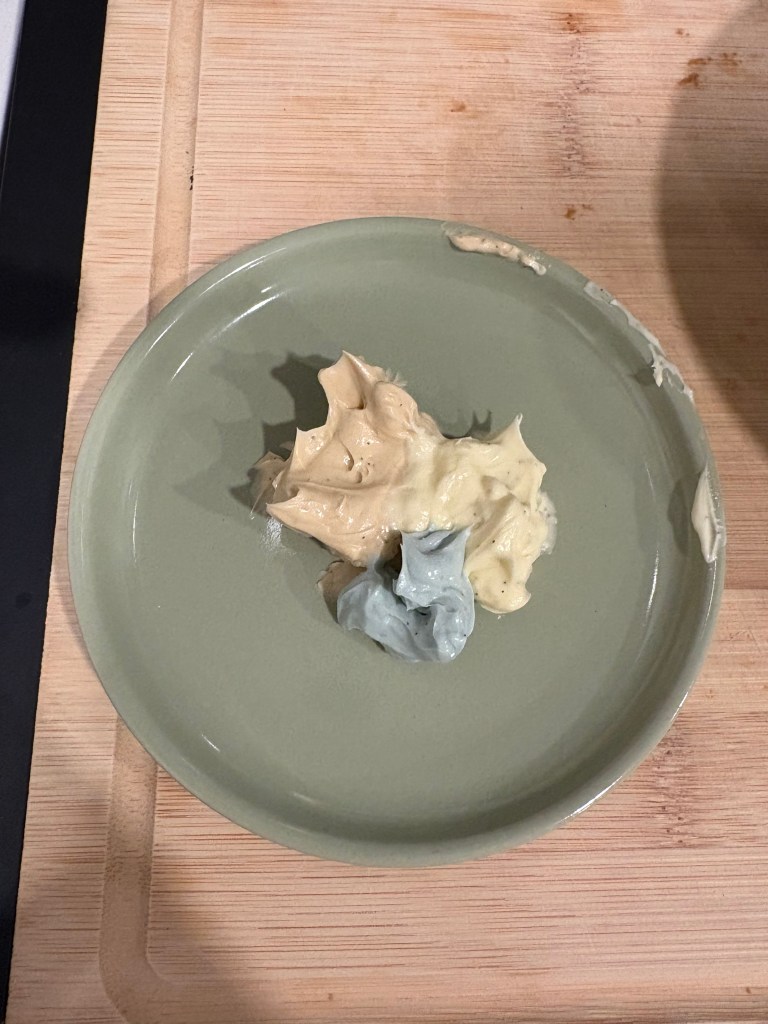
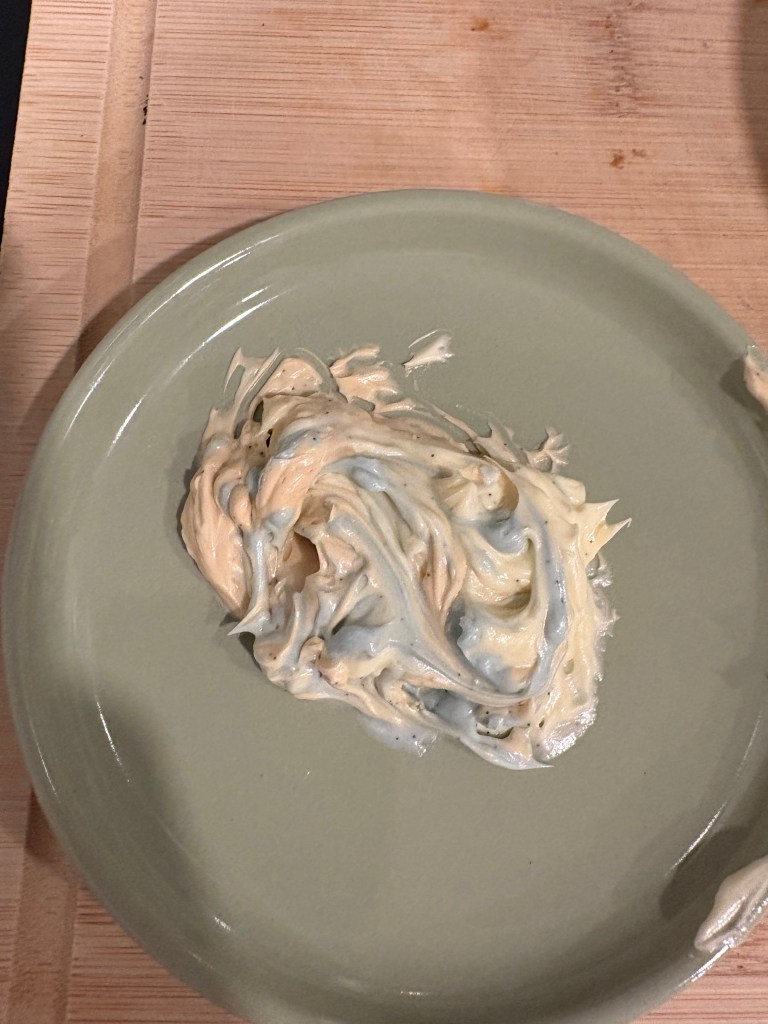
Optionally, add some espresso dots or a sprinkle of cocoa powder before you swirl to add some more fine detail. Once you get the marbling/ pattern you want, use an offset spatula to lift and transfer them into the seashell molds flipping the buttercream design onto the bottom of the mold (front side of the shell).
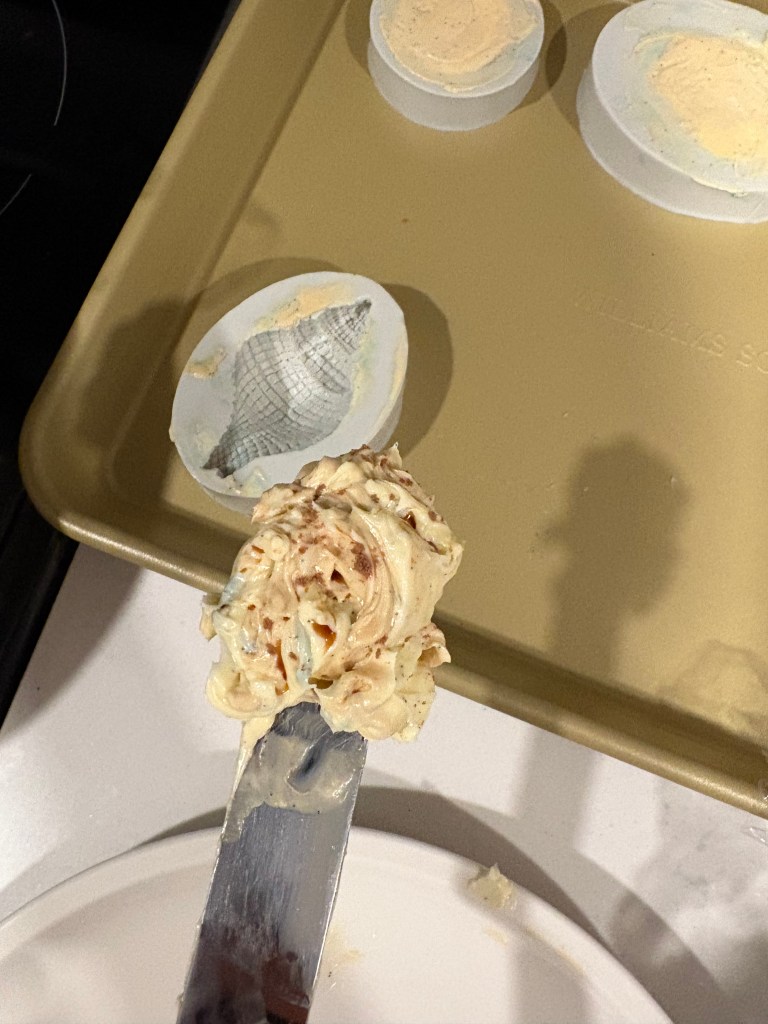
3. Repeat this step until you have filled all molds.
4. Place the molds on a small tray or plate, cover, and refrigerate until the butter inside the mold is hardened. You can leave them overnight or you can check them in 1-2 hours, depending on your schedule.
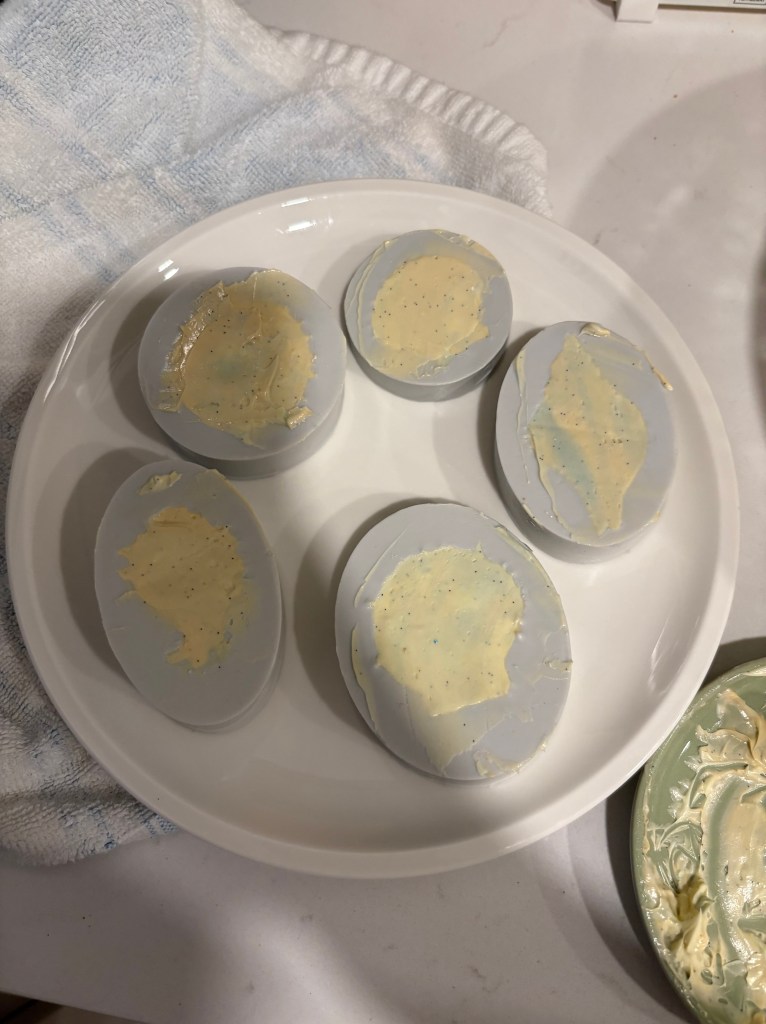
5. When hardened, gently take them out of the silicone mold. If you want to make another round, you can now do so until you have enough shells for decorating. I made two rounds for 10 shells.
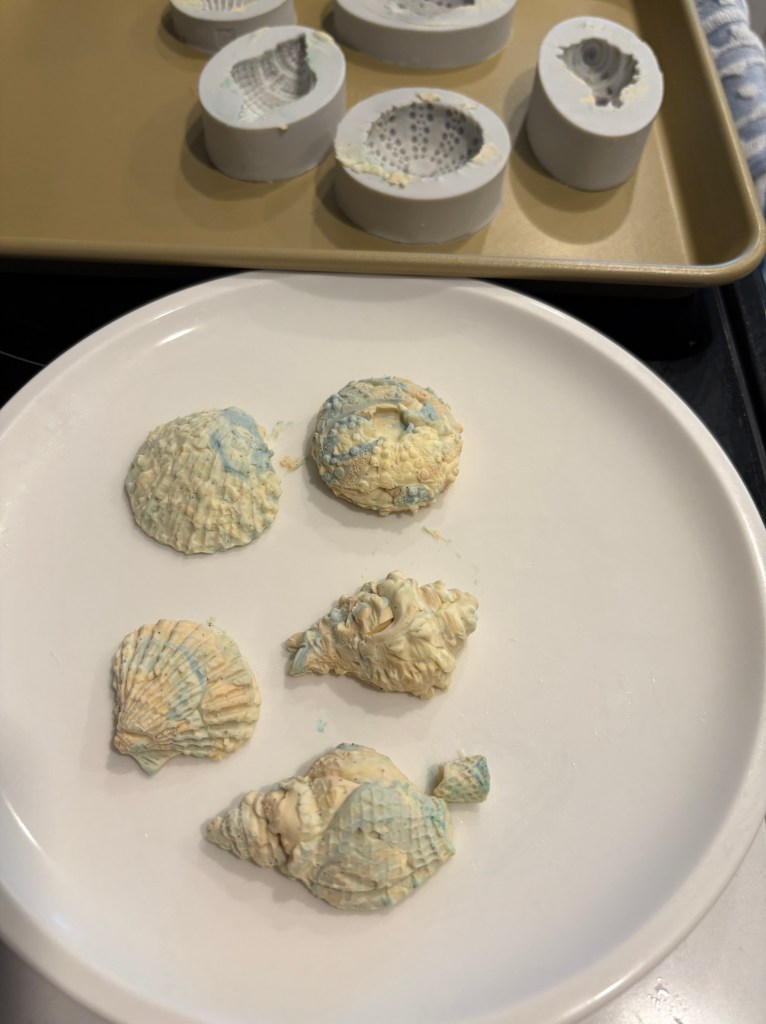
6. Arrange the seashells on the top of your cake in whatever decorative pattern you want. I varied the shells by shell type and color pattern.
Some notes:
- This part is really fun and a moment to bring out your inner watercolor painter. The trick is not to over-mix so that the colors blend too much and you lose the marbling effect. You also don’t want the marbling to look so even that you lose the natural, randomness of color that real shells have. Imperfections are part of a shell’s beauty so don’t overthink it.
- Another tip is to use varying amounts of each color. The colors you want to dominate the shell you can use more of, and the colors you want to just be little touches here and there, use less of. For my shells, I wanted to use a stronger white buttercream base, strong blue notes (so it would stand out on the cake), and just some brown notes blended in. That being said, I also created some shells that were more primarily brown and white (less blue) to create some shell variety.
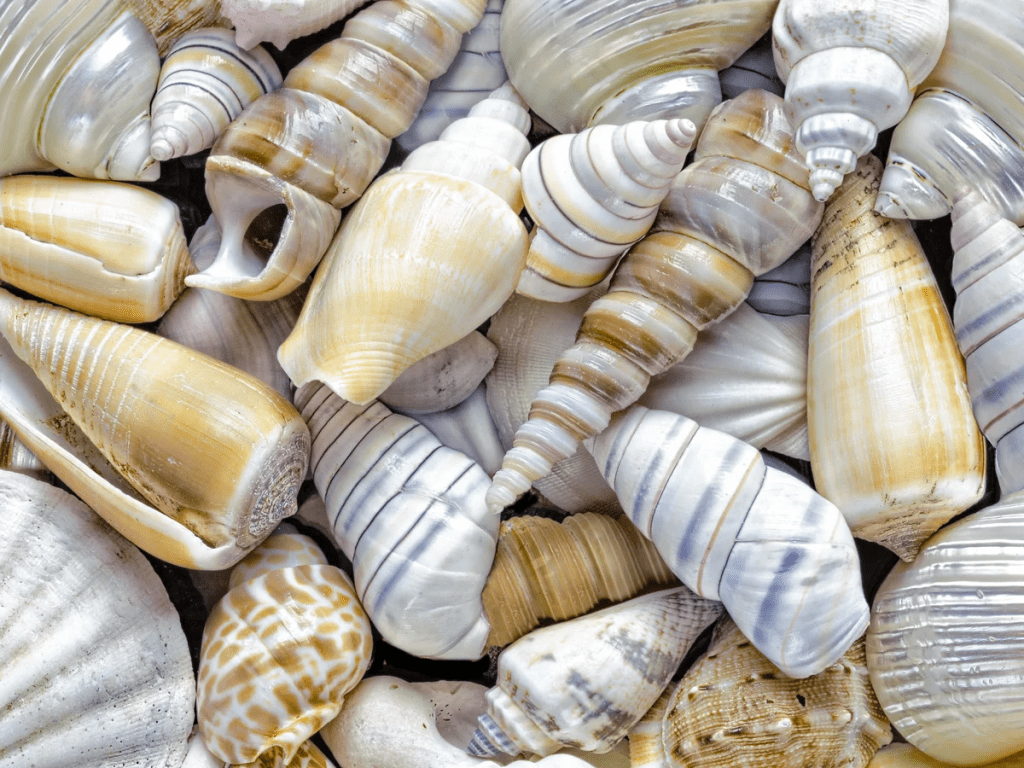
The picture of real shells I used for color inspo:
Concluding Thoughts:
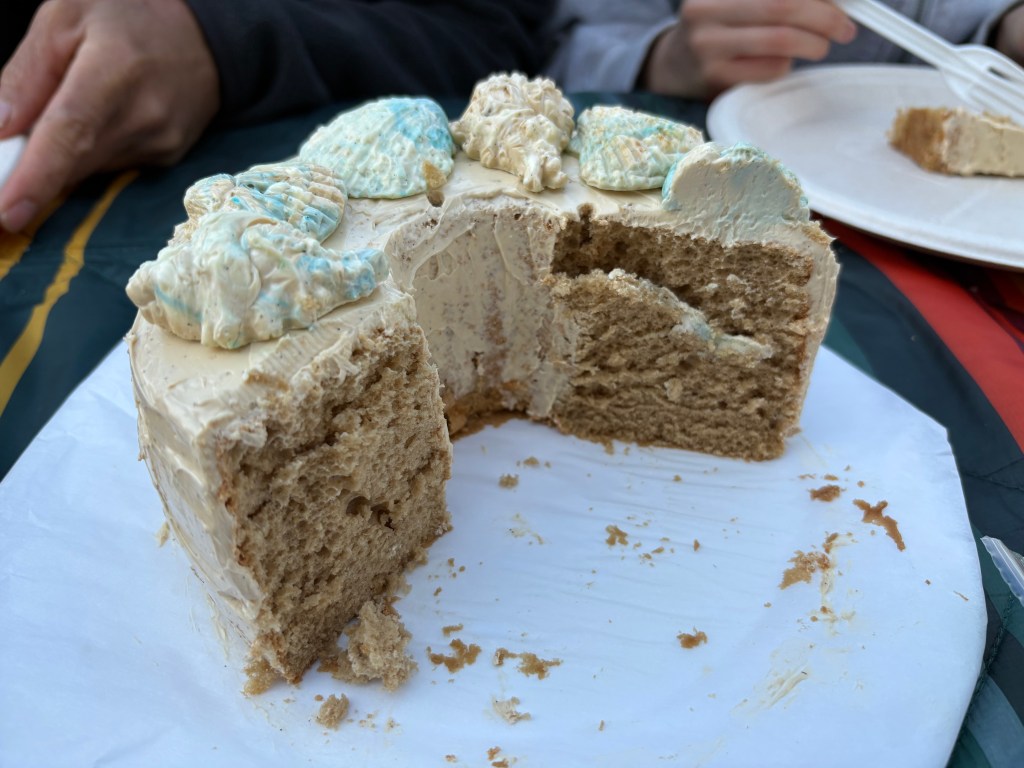
I want to say this cake made my dad’s birthday perfect, but of course, it was only a small, imperfect part. The buttercream was still “too buttery” for my mom, and the wind made it impossible to light candles to sing happy birthday, but it was still such a happy moment when my family was so excited by the edible shells and enjoying the fluffiness of the sponge and subtly sweet, bitter coffee and when the leftover cake still looked stable and delicious in the trunk of the car at the end of our long afternoon hiking.
To end with a message to my dad:
I hope in this year of life, you keep gathering seashell memories, like the ones you reach into your pocket to find again after a day at the beach, making you remember how the blue ocean was twinkling and so were your laughter-creased eyes.
With love,
your daughter, Emily


Leave a comment